
How to install OEM bikes on MX Bikes: upload the server version of the bike pack to your dedicated server, allow the bikes in dedicated.ini, then copy the full pack to your own computer.
Custom bikes have to be on both your dedicated server and every player's computer, so this guide has two parts: installing the bikes on your dedicated server and installing them on your computer.
How to install OEM bikes on MX Bikes: before you start
- For this guide we use the custom OEM bikes as an example. You can download them here: https://mxb-mods.com/oem-bike-pack/ (SERVER VERSION)
- Try to find bikes that are updated to the latest version of the game.
- Try to find bikes that have a server version to download.
How to install the custom bikes on your server
- Stop your server: press STOP in the game panel.
- Go to the Configuration Files button, edit
mxbikes.iniwith the Config Editor option, and enable the Enable mods option.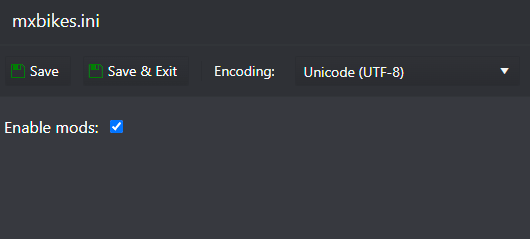
- Download the OEM Bikes. Be sure to download the SERVER VERSION.
- Go to the File Manager button, navigate to the folder
\mods\bikes\and press the Upload button. Upload theMX1OEM*.pkzfiles from your computer. You can drag and drop from your computer folder to the server bikes folder.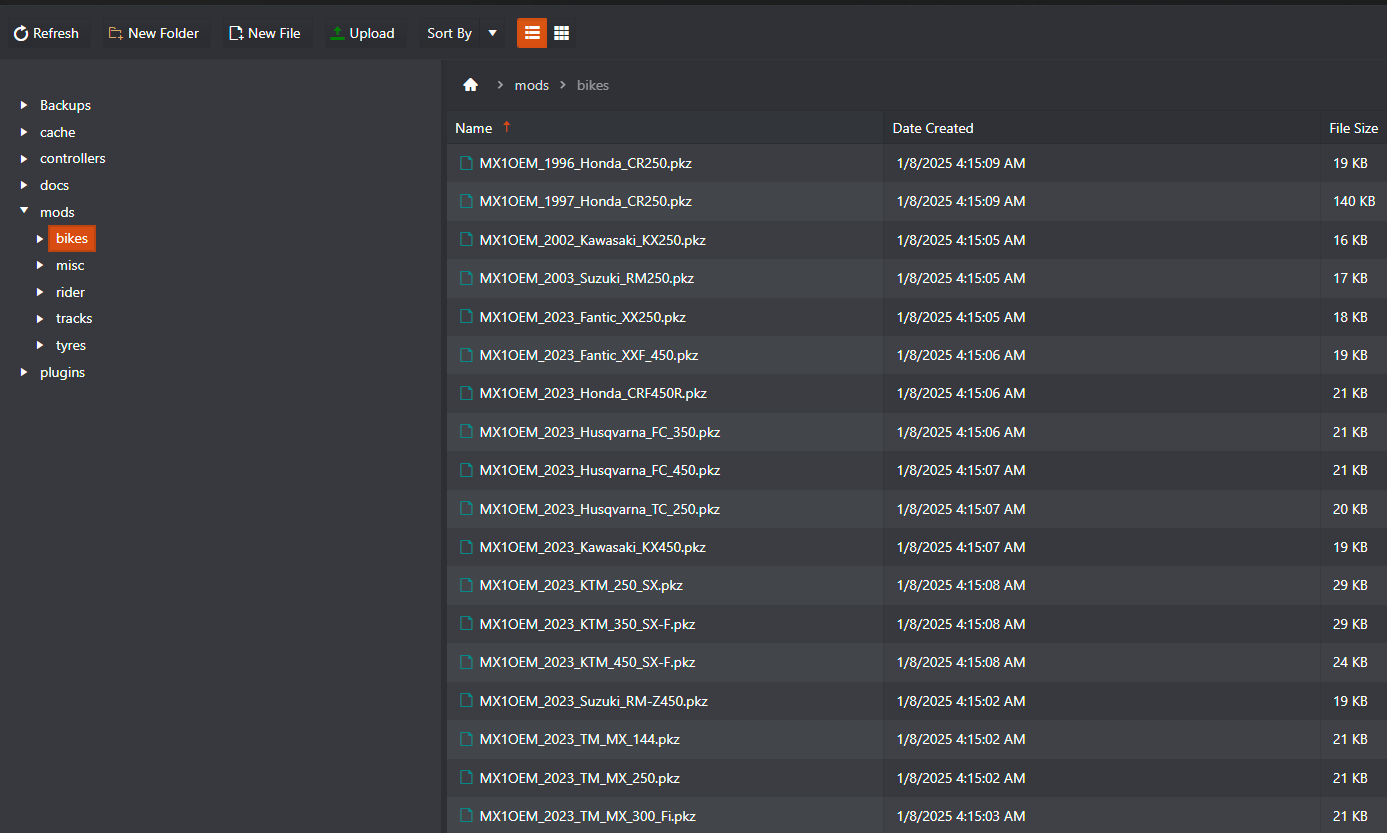
- Go to the File Manager button, navigate to the folder
\mods\tyres\and press the Upload button. Upload theoem_mx.pkzfile from your computer. You can drag and drop from your computer folder to the server tyres folder.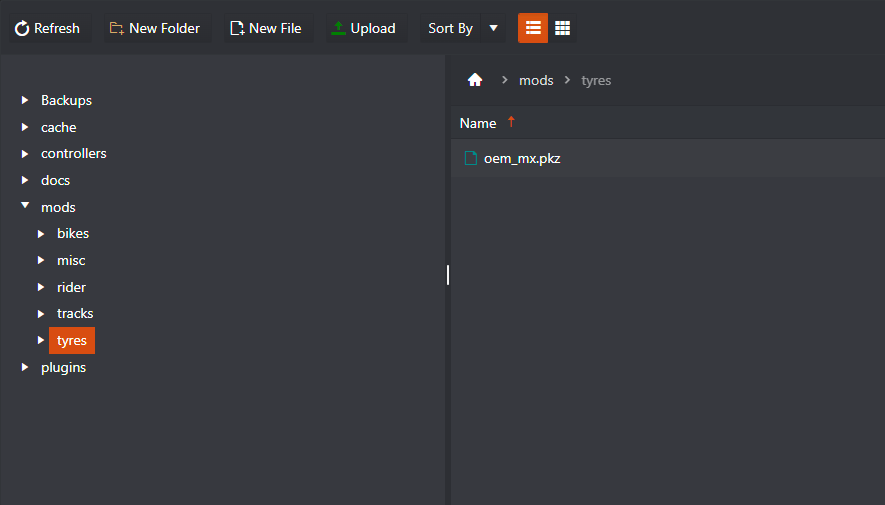
- Go to the Configuration Files button and edit the
dedicated.inifile. - Add the bikes category to the
categoryfield under the[event]section, for example:category = MX1-2t OEM/MX1 OEM/MX2-2t OEM/MX2 OEM/ - Add the allowed bikes to the
allowed_bikesfield under the[event]section, for example:allowed_bikes = 450xf/450sm/350xf/250xf/
- Start your server.
OEM bikes: full lists for dedicated.ini
OEM Bikes Category - Full List
MX1-2t OEM / MX1 OEM / MX2-2t OEM / MX2 OEM / Supermoto OEM / Enduro
OEM Bikes Allowed - Full List
250x/350xf/450sm/450xf/ MX1OEM_1996_Honda_CR250 / MX1OEM_2002_Kawasaki_KX250 / MX1OEM_1997_Honda_CR250 / 250xf / MX1OEM_2003_Suzuki_RM250 / MX1OEM_2023_Fantic_XX250 / MX1OEM_2023_Honda_CRF450R / MX1OEM_2023_Husqvarna_FC_350 / MX1OEM_2023_Husqvarna_FC_450 / MX1OEM_2023_Husqvarna_TC_250 / MX1OEM_2023_Kawasaki_KX450 / MX1OEM_2023_KTM_250_SX / MX1OEM_2023_KTM_350_SX-F / MX1OEM_2023_KTM_450_SX-F / MX1OEM_2023_TM_MX_144 / MX1OEM_2023_Suzuki_RM-Z450 / MX1OEM_2023_Yamaha_YZ450F / MX1OEM_2024_Beta_RX_450 / MX1OEM_2024_GasGas_MC_250 / MX1OEM_2024_GasGas_MC_350F / MXEOEM_2018_Alta_Redshift_MXR / MXEOEM_2023_Stark_VARG / MX3OEM_Service_Honda_CR500AF / MX3OEM_2023_TM_MX_530_Fi / MX3OEM_2023_TM_MX_300 / MX3OEM_2023_KTM_300_SX / MX3OEM_2022_Beta_300_RX / MX3OEM_2021_KTM_KX_500 / MX2OEM_2025_Fantic_XXF_250 / MX2OEM_2024_Yamaha_YZ250F / MX2OEM_2024_GasGas_MC_250F / MX2OEM_2024_GasGas_MC_125 / MX2OEM_2023_Yamaha_YZ125 / MX2OEM_2024_Triumph_TF_250-X / MX2OEM_2023_TM_MX_250_Fi / MX2OEM_2023_TM_MX_125 / MX2OEM_2023_Suzuki_RM-Z250 / MX2OEM_2023_KTM_250_SX-F / MX2OEM_2023_KTM_125_SX / MX2OEM_2023_Kawasaki_KX250 / MX2OEM_2023_Husqvarna_TC_125 / MX2OEM_2023_Husqvarna_FC_250 / MX2OEM_2023_Honda_CRF250R / MX2OEM_2023_Fantic_XX125 / MX2OEM_2003_Suzuki_RM125 / MX2OEM_2002_Kawasaki_KX125 / MX2OEM_1996_Honda_CR125 / MX1OEM_2025_Triumph_TF_450-RC / MX1OEM_2025_Fantic_XXF_450 / MX1OEM_2024_GasGas_MC_450F / MX1OEM_2023_Yamaha_YZ250 / MX1OEM_2023_TM_MX_450_Fi / MX1OEM_2023_TM_MX_300_Fi
In dedicated.ini, separate the entries with / and end the line with /, as in the examples above.
How to install the custom bikes on your computer
Every player who joins your server does this on their own PC.
- Close the MX Bikes game.
- Download the OEM Bikes (FULL PACK). Be sure to download the FULL PACK VERSION.
- Copy the bikes folders to your computer's
\Documents\PiBoSo\MX Bikes\mods\bikesfolder.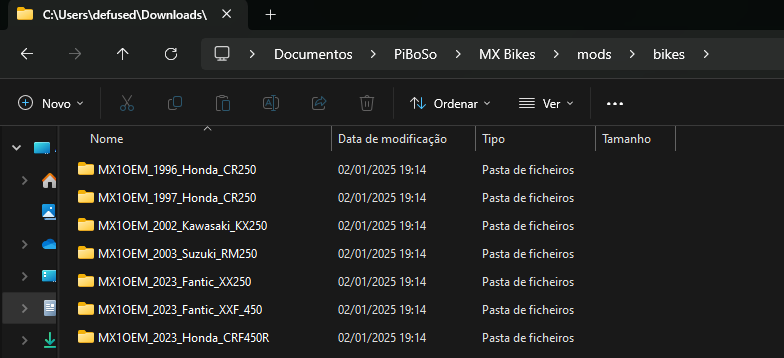
- Copy the
oem_mx.pkzfile to your computer's\Documents\PiBoSo\MX Bikes\mods\tyresfolder.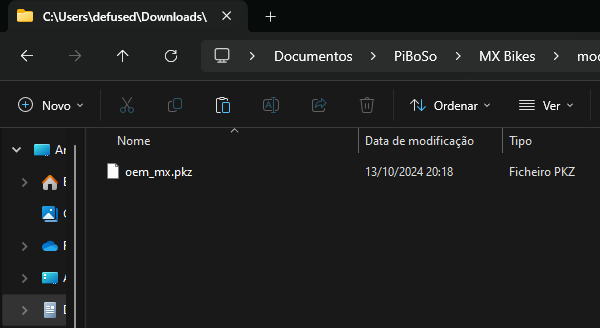
- Open the MX Bikes game and select the correct bikes in the Bikes menu.
MX Bikes custom bike questions
How do I install OEM bikes on MX Bikes?
On the server: enable mods in mxbikes.ini, upload the server version MX1OEM*.pkz files to \mods\bikes\ and oem_mx.pkz to \mods\tyres\, then add the categories and allowed bikes to dedicated.ini. On your PC: copy the full pack bike folders to Documents\PiBoSo\MX Bikes\mods\bikes and oem_mx.pkz to mods\tyres.
Which version goes on the server and which on my PC?
Upload the SERVER VERSION to your dedicated server. Install the FULL PACK VERSION on your own computer, and every player needs it too.
Why can't players pick the custom bikes on my server?
Check that Enable mods is on in mxbikes.ini, that the bikes and the tyre file are in the right server folders, and that their category and names are in the category and allowed_bikes fields under [event] in dedicated.ini. Then restart the server.
Want your own MX Bikes server? Run custom bikes and tracks on it: see MX Bikes server hosting.
Related guides
If you have any questions or need our help, open a support ticket.