This guide will help you on how to setup your Last Oasis Realm.
- Stop you server
- Click on the My Realm button on your game panel and login with your Steam/XBOX account
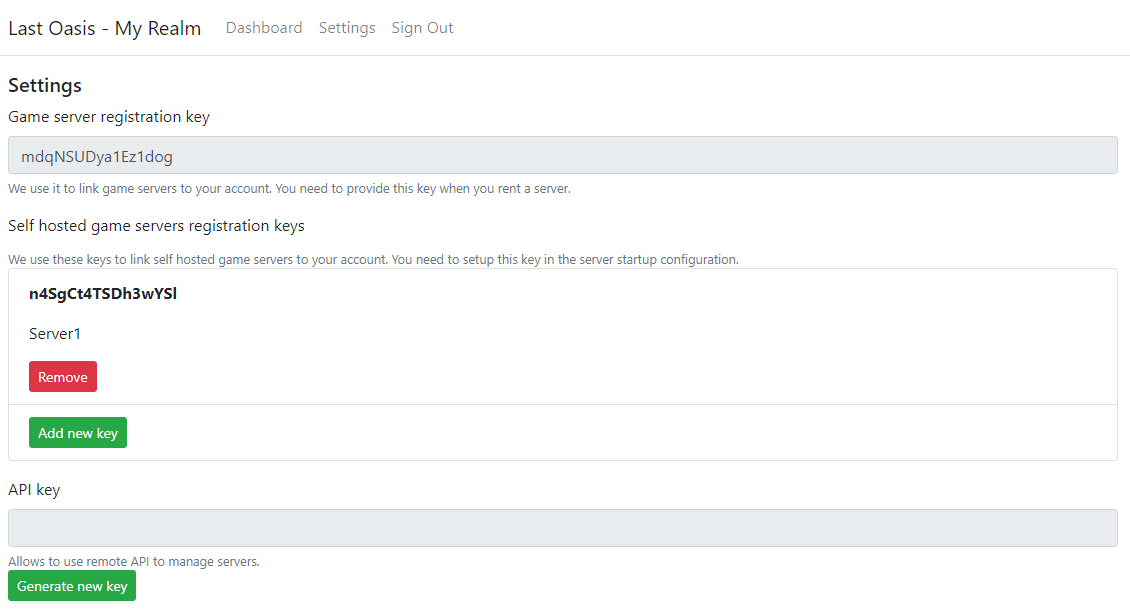
- Once inside go to Settings and add a new Key, name it something easier for you to know to what server belongs.
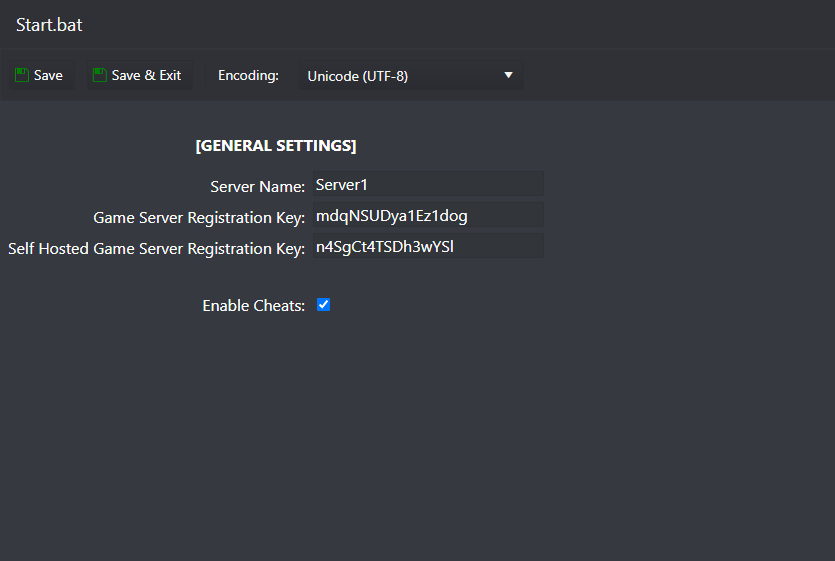
- Edit Start.bat file inside Configuration Files button and fill up the details respectively with the details from the previous step
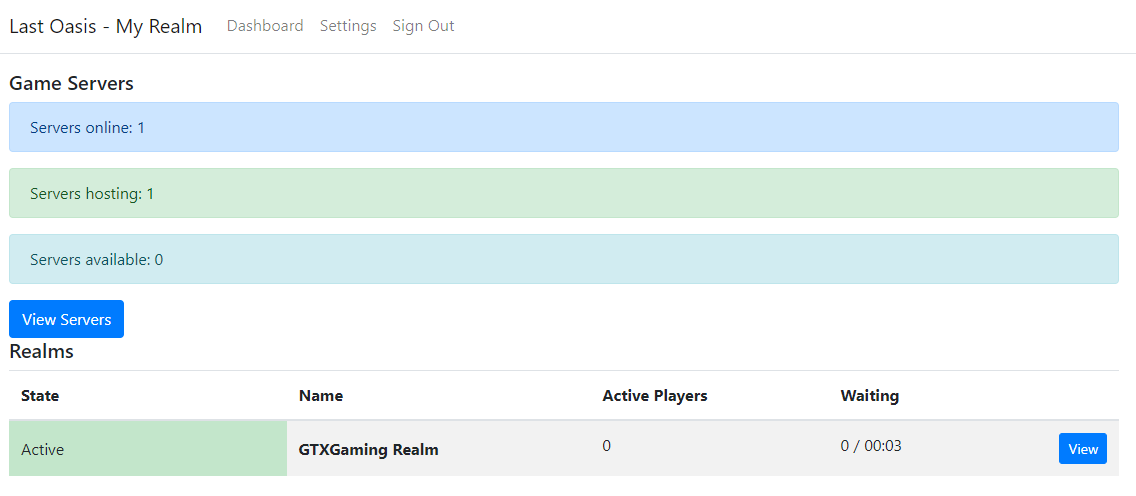
- Start your server and wait a few minutes for it to show online on the My Real website
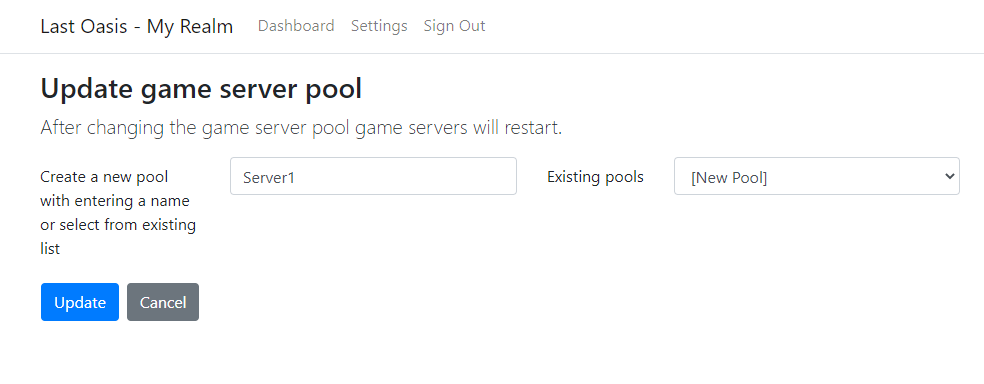
- Click on View Servers and create a New Pool for the server using the same name to easily identify it
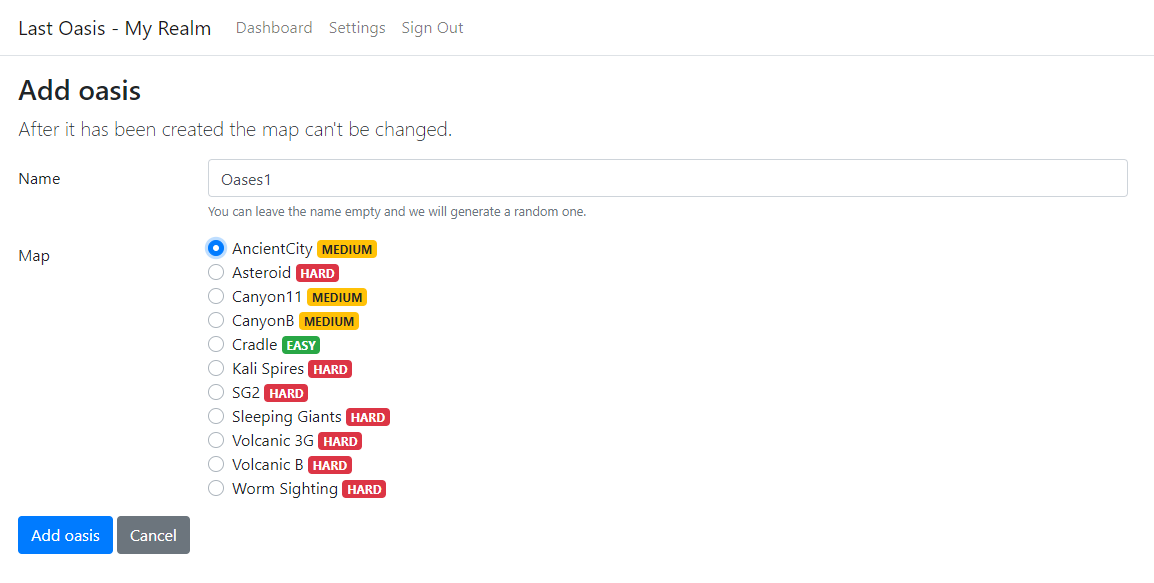
- Go to the Dashboard menu and create a new Realm, it will list your Realm under Realms section
- Click on the View button on the Realm you created and the bottom Create an Oases inside select a Cell and Add an Oases
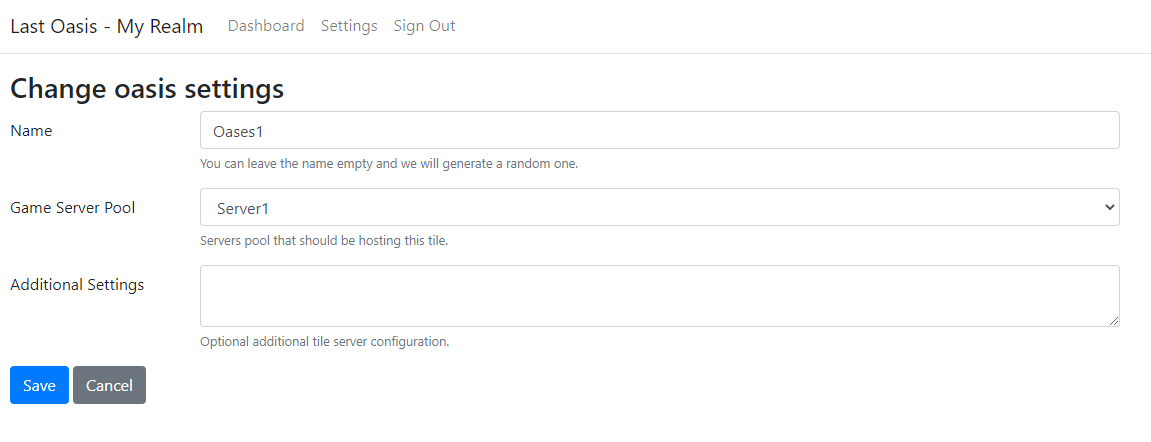
- Click on the Oases select Edit and give it a name and select the Pool you created for this server
- At the end Activate the Oases

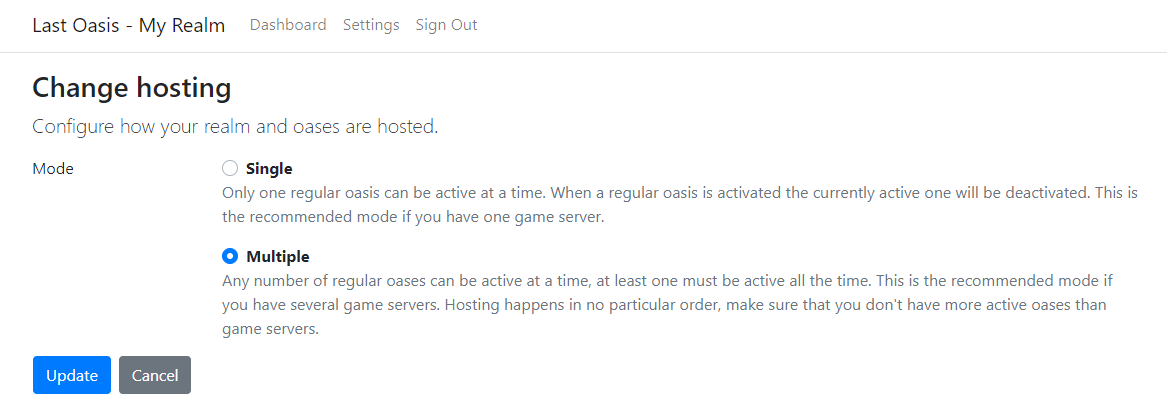
If you want to add more servers to your Realm, enable the multiple hosting options inside the Change Hosting menu and repeat the steps for each server you want to add.
In the following link you can find detailed information about how Realms work, admin commands, spawn items and much more!
If you have any questions or you need our help don't hesitate to contact our support system.
