This guide will help you on how to add Rain Weather to your Assetto Corsa server.
READ BEFORE YOU START - REQUIREMENTS - WARNINGS
Assetto Corsa game by default does not support Rain Weather on Dedicated servers only on Solo or Local servers, to have Rain Weather on a Dedicated Server you need RainFX (CSP Preview version) and AC Server Manager Premium, both are paid addons, right now there are no free solutions to have Rain Weather on an Assetto Corsa dedicated server, find below all you need to have Rain Weather.
- You need Content Manager installed on your computer, this is a free launcher, get it from this link: Content Manager Download
- You need the RainFX (CSP Preview version) addon, you can buy it on their Patreon: RainFX Patreon
- You need AC Server Manager Premium, you can install it on your server from the Mod Manager button, and buy and install the license following this guide: AC Server Manager Premium License
- Not all custom tracks and cars have Rain Weather support, the track will feel wet while driving but the weather animation will not show, all official tracks and cars have Rain Weather support
- You can create multiple Weather presets and they will transition between them based on the duration time you define for each preset
1# INSTALL RAINFX (CSP PREVIEW VERSION) ON CONTENT MANAGER
- Once you have RainFX (CSP Preview version) downloaded to your computer open Content Manager and go to Settings then Custom Shaders Patch menu
- Click on the three dashes icon on the right top corner and select the Install from file option
- Find the RainFX (CSP Preview version) zip file and open it
- Click again on the three dashes icon on the right top corner and press the Install button on the Custom Shaders Patch
- Once installed, confirm you are on the Preview version and take note / copy the Shaders Patch Version ID, you going to need it later in this guide
2# ENABLE EXTRA CUSTOM SHADERS PATCH ON AC SERVER MANAGER PREMIUM
- Once you have AC Server Manager Premium installed, if you didn't enable the Extra Custom Shaders Patch option on the initial setup, go to the Server menu then Options on your AC Server Manager Premium top menu
- Scroll down until the Content Manager Integration section and enable the Enable Extra Custom Shaders Patch option

3# CREATE CUSTOM RACE WITH RAIN WEATHER ENABLED
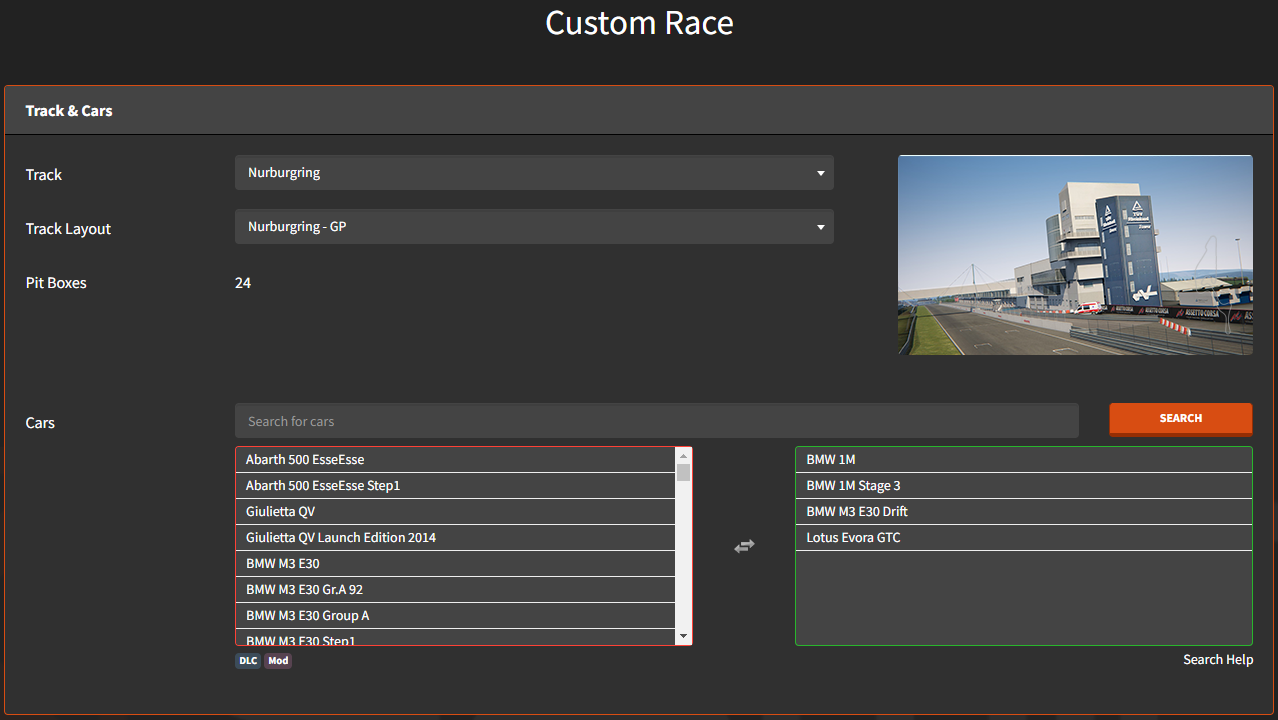
- Go to the Races top menu on AC Server Manager Premium and then Create New under Custom section
- Select the Track, the Track Layout, and the Cars you want (not all custom tracks and cars have Rain support, all official tracks and cars have support)
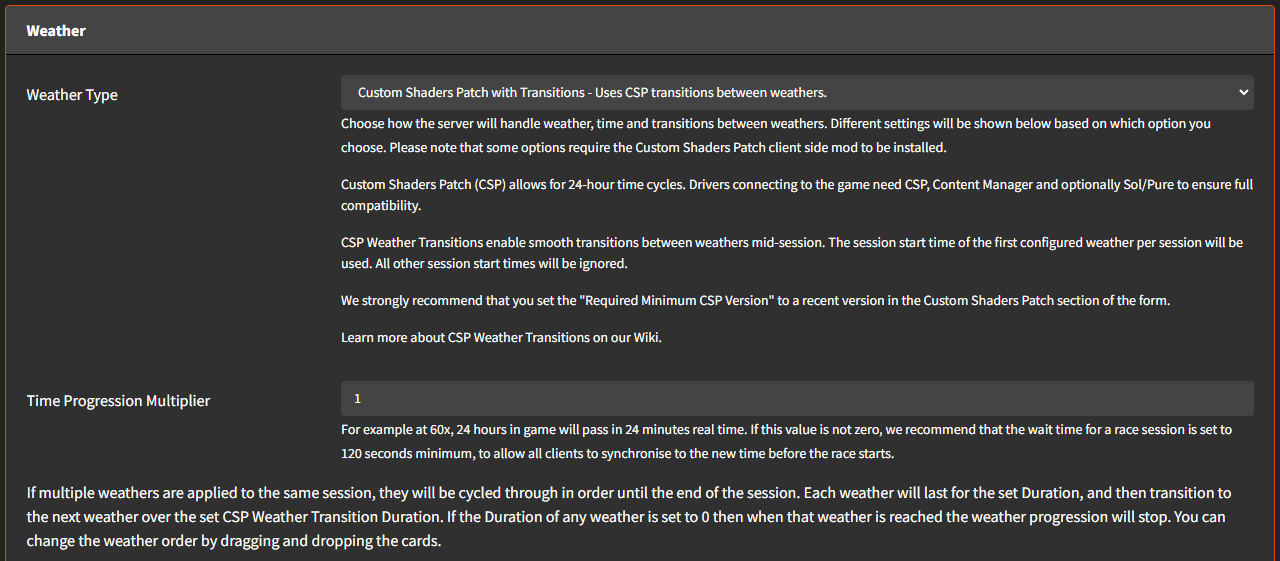
- Scroll down to the Weather section and select the Custom Shaders Patch with Transitions - Uses CSP transitions between weathers from the Weather Type dropdown box
- Set the Time Progression Multiplier to 1
- Select the Rain (Sol) option from the Graphics dropdown
- Define the Session Start Date/Time you desire
- Set the Duration (minutes) to 10 minutes for example
- Set the CSP Weather Transition Duration (seconds) to 240
- Set the Custom Rain Preset to Rain/Wet
- Scroll down to the Custom Shaders Patch section and set the Required Minimum CSP Version with the Shaders Patch Version ID you got from STEP 5 when you installed RainFX (CSP Preview Version) before in this guide
- Set the Enable both custom car and track physics option from the Core Options dropdown
- Add the following options inside the Extra Options text box
- [RAIN_PREVIEW]
INTENSITY = 1
REQUIRED = 1
WITH_PHYSICS = 1 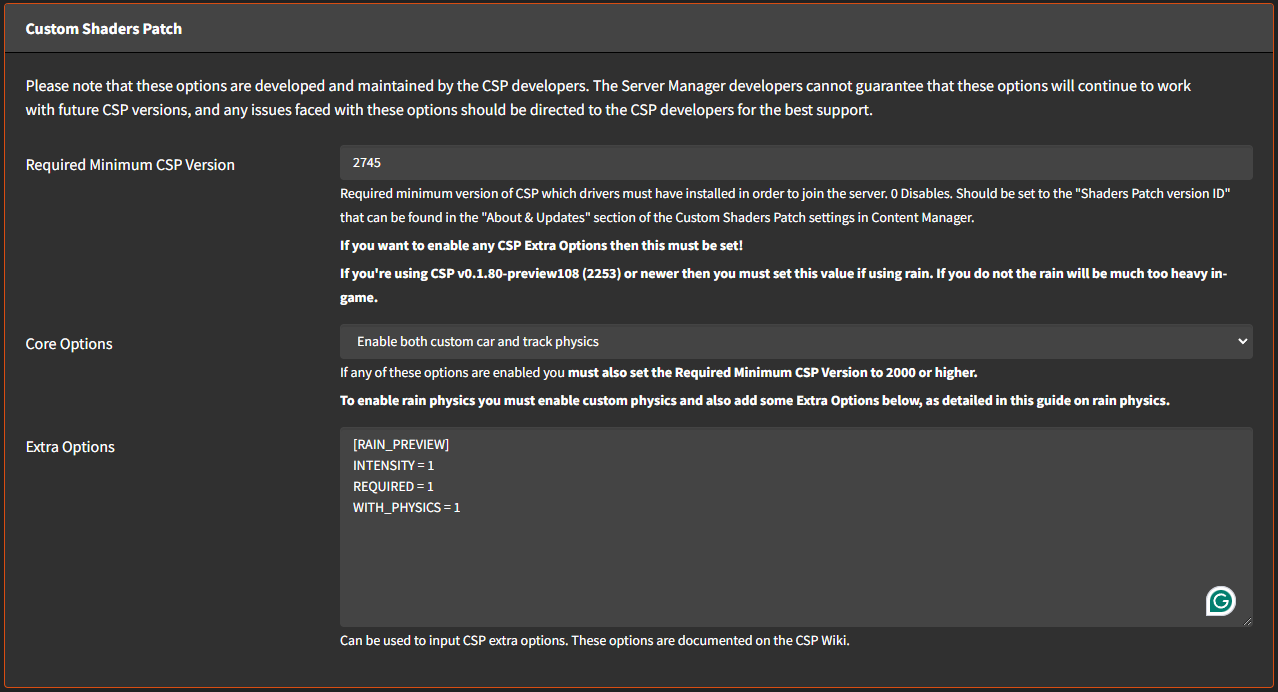
- [RAIN_PREVIEW]
- Scroll down to the Rules section and add/allow the CSP Wet (WET) option from the Legal Tyres box
- Save the Race at the end of the page


4# START THE RACE AND JOIN THE SERVER
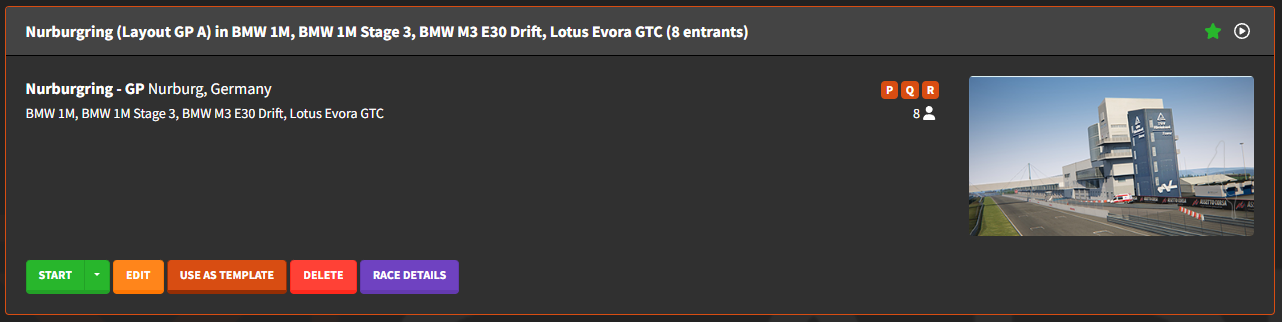
- Once you press Save Race on the previous step, it will redirect you to the Custom Races list, you will see the race you just created on top of the list, press the green START button
- Once the Race is started, and you are on the Live Timing page, click on the green JOIN button on the left side
- The Content Manager window will open, select the car you want to drive and press the Join button at the bottom


WARNING - KNOWN ERRORS
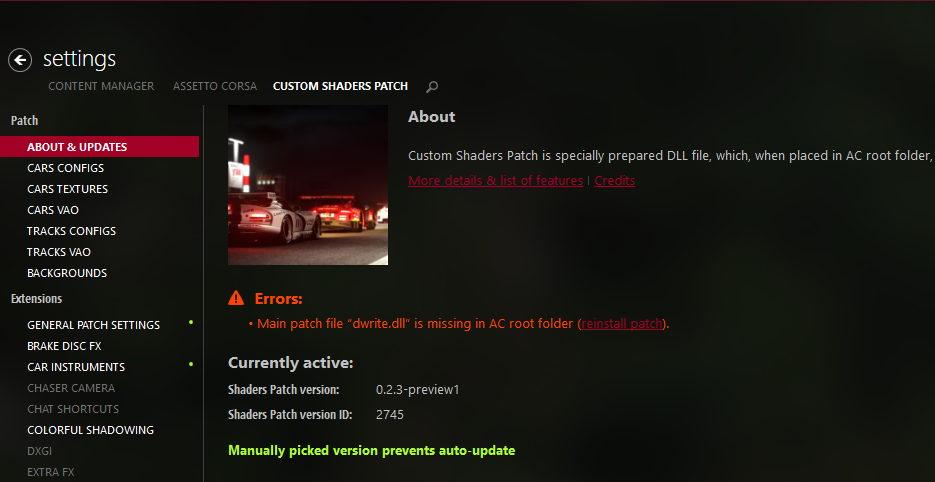
- If you get an error Game Crashed with a similar reason from the image below, means RainFX (CSP Preview Version) didn't install correctly
- Open Content Manager and under the Settings menu and Custom Shaders Patch sub menu, if you see the error Main patch file "dwrite.dll" is missing in the AC root folder, means Content Manager didn't installed RainFX (CSP Preview Version) correctly
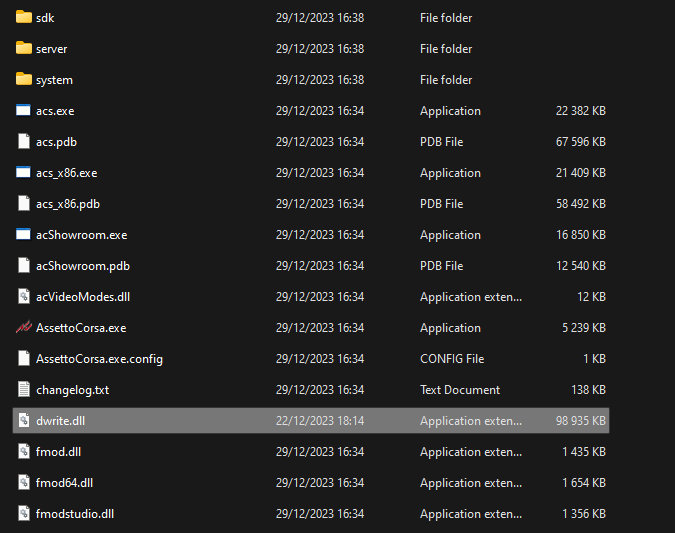
- Unzip the RainFX (CSP Preview Version) zip file to your Assetto Corsa installation folder, usually installed on the C:\Program Files (x86)\Steam\steamapps\common\assettocorsa\ folder

If you have any questions or you need our help don't hesitate to contact our support system.
