This guide will help you on how to add admins and setup their permissions on your 7 Days to Die dedicated server.
HOW TO ADD ADMINS
- Stop server
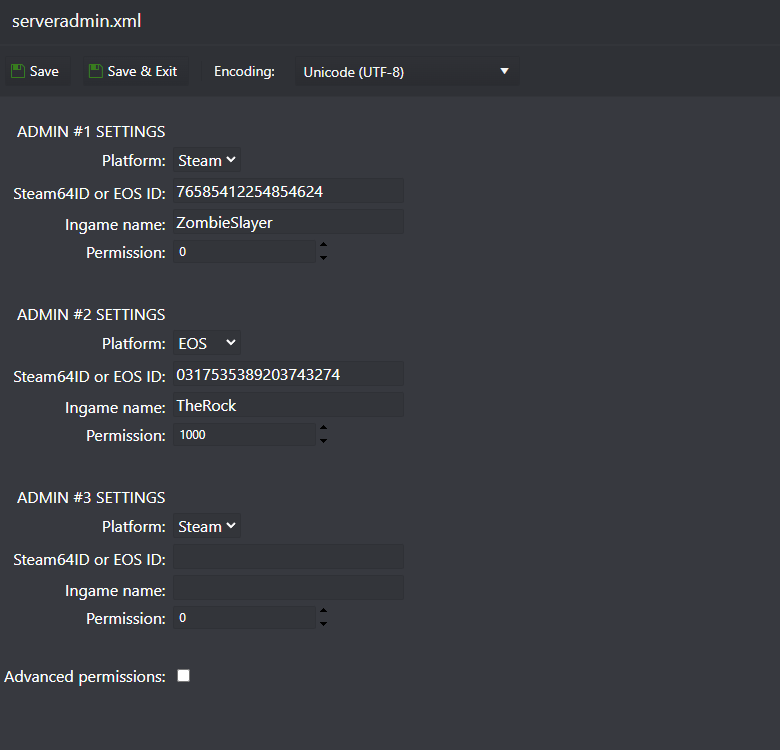
- Go to Configuration Files and edit the serveradmin.xml file with CONFIG EDITOR option
- Select the player platform, then fill up the Steam64ID if the player is on Steam or EOS ID if the player is on EPIC and the player name (check below how to get the Steam64ID or EOS ID)
- Start server
HOW TO FIND THE STEAM64ID OR EOS ID
- If the player is playing on Steam, you can get their Steam64ID using this website: GET STEAM64ID
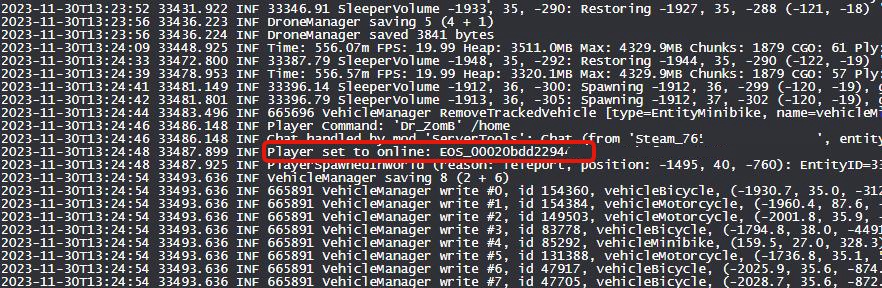
- If the player is playing on Epic/Xbox, you need their EOS ID, you can get that EOS ID from the Web Console button, ask the player to join the server, with Web Console open, and you will see his EOS ID like the image below, just remove the EOS_ part, only add the numbers.
HOW TO SETUP THE PERMISSIONS
PERMISSIONS ALREADY COME PRE-CONFIGURED, ONLY CHANGE THEM IF YOU REALLY NEED
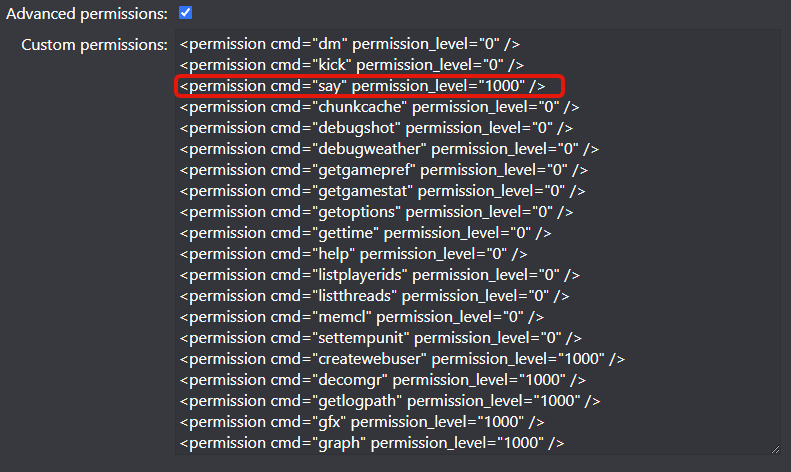
- Inside serveradmin.xml file, enable the Advanced Permissions option at the bottom
- Under the command permissions field, you can change the permission level you want to assign to each command, admins can only execute commands that are set to their permission level or higher, for example, if a player have a permission level of 500, can only execute commands from 500 up to 1000, the 0 it's the super admin, can execute all commands.
If you have any questions or you need our help don't hesitate to contact our support system.


