
How To Use SSH Keys In Linux: An In-Depth Guide
Hello there, Linux friend! Excited to unlock the mysteries of SSH keys? You've come to the right place! This guide will navigate you through all you need to know about harnessing SSH keys in Linux. Let's not dilly-dally and dive right in!
What is SSH and why should I care about SSH keys?
SSH, or Secure Shell, is a secure protocol used to gain access to remote servers and computers. Think of it as a hidden passageway into a closed fortress (your server) that houses all the magic (data and applications). Now, wouldn't it be awesome if you could step into this fortress without having to remember a complex password each time? Well, that's where SSH keys come in handy.
SSH keys are a pair of cryptographic keys that can be utilized for authentication to an SSH server, acting as a viable alternative to password-based logins. This pair consists of a private key (keep this one under wraps) and a public key (this one's for sharing).
So, let's learn how to create and use these keys!
Step 1: Checking for existing SSH keys
Before we jump into creating a new pair, let's ensure if you already have SSH keys on your machine. Fire up your terminal, and type:
ls -al ~/.ssh
If you see files named id_rsa.pub (your public key) and id_rsa (your private key), congratulations, you already have SSH keys set up. If not, it's time to generate some!
Step 2: Generating SSH keys
Now, let's create a new SSH key pair. Run the following command in your terminal:
ssh-keygen -t rsa -b 4096 -C "your_email@example.com"
Don't forget to replace "your_email@example.com" with your actual email address. This creates a new SSH key using a 4096 bit encryption (talk about being secure!), associated with your email.
The terminal will prompt you to save the key. The default location (~/.ssh/id_rsa) is usually a good choice, so feel free to hit Enter to accept it.
Next, it'll ask for a passphrase. This is an extra layer of security for your SSH keys. If you'd like to use a passphrase, enter it here and press Enter. If you'd prefer no passphrase, just press Enter.
Step 3: Adding SSH Key to the SSH-Agent
Our next step involves adding our newly generated SSH key to the SSH-Agent. But first, we need to ensure the SSH-Agent is running. To do this, enter:
eval "$(ssh-agent -s)"
After the SSH-Agent is running, we add our SSH key to it using:
ssh-add ~/.ssh/id_rsa
This command stores your key, so you don't have to keep entering your passphrase (if you set one).
Step 4: Sharing your public key with the server
With your keys generated and added to the SSH-Agent, it's time to share your public key with your server. This makes your server recognize and trust your machine.
To do this, we need to display the content of your public key. Use the following command:
cat ~/.ssh/id_rsa.pub
This command will display a long string which is your public key. Copy it, but be careful not to add extra spaces or change any characters.
Now, access your server using SSH and find the file ~/.ssh/authorized_keys. Paste your public key into this file. If the file or directory does not exist, you'll need to create them.
Step 5: Logging in with SSH Keys
Now, you're all set to log into your server using your SSH keys. Just use the standard SSH command:
ssh username@your_server_ip
And voila! You're in, without even having to remember a password. If you set up a passphrase, you'll be asked to enter it now.
Step 6: Bonus - Disabling password authentication
For an extra layer of security, you can disable password authentication completely so that only SSH key holders can access the server. On your server, find and edit the SSHD config file:
sudo nano /etc/ssh/sshd_config
Find the line that says PasswordAuthentication and change it to no. Then save and close the file. To apply these changes, restart SSH:
sudo systemctl restart ssh
Now, only those with the correct SSH key can access your server. High five, you've just boosted your server security!
Step 7: Using PuTTY for SSH on Windows
If you're a Windows user, you might be wondering how to use SSH keys. Well, that's where PuTTY comes in handy. It's a free, open-source terminal emulator that supports SSH, among other protocols. You can download PuTTY here.
Once you've downloaded and installed PuTTY, you'll also need PuTTYgen to generate SSH keys. You can find it in the PuTTY folder in your Start menu, or on your desktop if you chose to create a shortcut during installation.
Open PuTTYgen and click 'Generate'. Move your mouse around in the blank area to generate some randomness (or 'entropy') which is used to create a secure key. Once it's done, you'll see your public key. You can enter a passphrase for extra security, then save your public and private keys in a secure place.
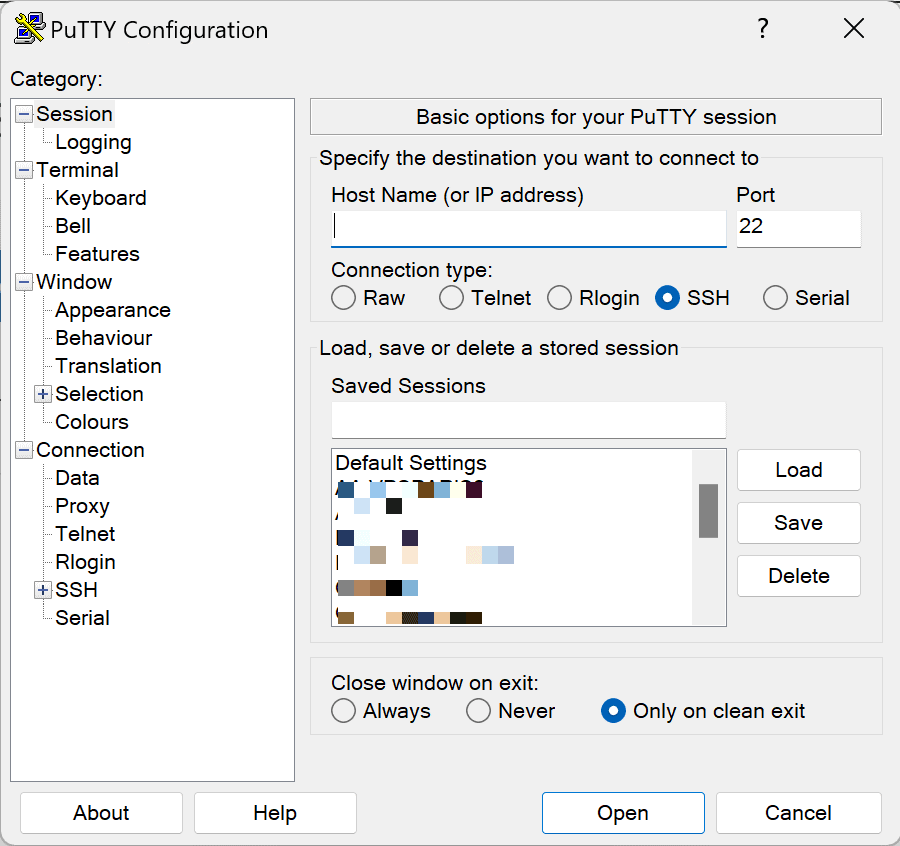
Now, to connect using SSH, open PuTTY, enter your server's IP address and port, then go to Connection > SSH > Auth in the left-hand menu. Here, you can browse to find your private key file. Then go back to the Session screen, save your session for easy access later, and click 'Open' to start the SSH session!
If you set a passphrase when creating your key, you'll be prompted to enter it before the dedicated server lets you in. And that's it, you're now connected to your server using SSH on Windows!
That wraps up our journey into SSH keys in Linux. Remember, with great power (and great keys) comes great responsibility. Keep your keys safe, and they'll keep your server safe in return. Happy SSH-ing!