Hardmode Bosses:
Are you ready to take on Terraria’s biggest and baddest bosses in hardmode? These epic battles will really put your skills to the test, but the rewards are well worth it.
The rewards from these bosses will set you up for success against even tougher hardmode enemies. Keep at it, build the best gear you can, and there’s nothing in your Terraria Server you can’t defeat!
Queen Slime
Let’s talk about one of the most exciting boss battles in Terraria - Queen Slime! This cheery yet challenging fight will really test your mobility and skill. Here are some tips to send her packing in style

Get the Black Spot
This infinite flight mount is ideal for dodging Queen Slime’s attacks. You can find it as a rare drop from Pirate Captains in the Pirate Invasion event.
Build an arena
Construct a large open space for battle. Include multiple levels connected by ropes or platforms. You’ll need room to dodge her spikes, slime rains and charges.
Phase 1: Avoid the Spikes
In her first form, Queen Slime will summon spiky slime minions and shoot spikes from her body. Circle around her to dodge the spikes, then attack the minions. Once they’re defeated, she’ll transform.
Phase 2: Dodge and Weave
Queen Slime’s second form is more aggressive. She will charge at you, drop slime rains from above and fire spread shots. Stay mobile - fly up and over her charges, move sideways to evade the slime rain and spread shots. Attack her when there’s an opening, then keep moving!
Phase 3: The Final Showdown
In her final form, Queen Slime moves much faster. She will fill much of the arena with spikes and slime rain, leaving small safe spots. You’ll need expert flying and dodging skills to avoid damage while still attacking. Keep at it, and soon she will be defeated!
Some other tips for this epic encounter:
- Bring buff potions like Ironskin, Regeneration and Wrath/Rage potions.
- The Slime Mount or a slime-themed set like the Slime God armour can give you extra mobility.
- Piercing or area-of-effect weapons are useful for the minion phase.
- High DPS weapons will make quick work of Queen Slime's health bar.
The Queen Slime fight requires fast reflexes, but with the right gear and technique you'll be bouncing your way to victory over this slime sovereign in no time!
The Twins
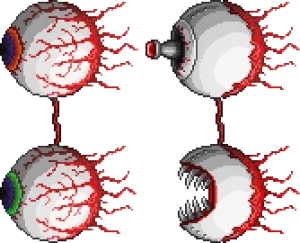
Once you smash a Demon Altar, you have a chance of The Twins spawning at night. These two giant eyeballs - Retinazer and Spazmatism - will swoop down and attack you with lasers and cursed flames.
Build a spacious arena
You'll want plenty of room to manoeuvre, so construct a large open area. Add multiple layers of platforms spaced far apart so you can dart between levels. The Twins move lightning fast, so give yourself space to dodge their attacks.
Focus fire and dodge
Concentrate your attacks on one Twin at a time; once you defeat one, the other will enrage, so take them out quickly! Use high-damage ranged weapons like the Black Spot or magic to keep your distance. Watch for Spazmatism's cursed flames and Retinazer's lasers and dodge away.
Accessories and potions
Equip mobility accessories like wings and grab potions to boost your speed, defence and magic. Mana potions and regeneration buffs will keep your spells flying. The longer the battle goes, the more intense the Twins' attacks become, so make every shot count!
You've got this!
Don't be intimidated - with the right prep, you can defeat these pesky pairs! Build your arena, focus your firepower, dodge their attacks and keep your health and mana up. Stay light on your feet, unleash a barrage of bullets and spells and you'll be celebrating your victory over The Twins in no time!
The Destroyer
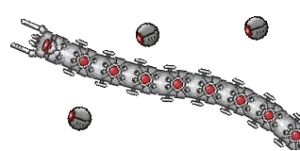
Defeating the Destroyer requires some preparation and strategy! This giant mechanical worm can be a tricky foe, but with the right gear and know-how, you’ll emerge victorious.
Summon it
To spawn the Destroyer, you’ll need to smash Demon Altars or Crimson Altars in the Corruption or Crimson, respectively. There’s about a 1 in 30 chance it’ll appear each night after that. If you want to take the fight to the beast, craft a Mechanical Worm and use it at night for a 1 in 10 chance it’ll burrow up.
The Fight
Once the Destroyer surfaces, the battle is on! This massive worm has a whopping 80,000 health points, so you’ll want the best gear you can get your hands on. At a minimum, molten or shadow armour and weapons are recommended.
Potions like Ironskin, Regeneration and Endurance will boost your stats. A diverse arsenal including yoyos, bows, guns and magic is ideal.
How to defeat it:
- Avoid its head and body at all costs - coming into contact with either will deal massive damage.
- Watch out for its lasers and probes. The Destroyer will shoot lasers from its segments that you’ll need to dodge. It also launches probes that will chase you down and self-destruct.
- Use the minimap to keep an eye on its location. The Destroyer can move deceptively fast underground, so keep tabs on it at all times.
- Focus fire on its probes and middle segments. Destroying probes will minimise damage, while attacking the middle will deal the most damage to its health pool.
- Use buffs when needed and keep your health up. This is an endurance battle, so any buffs, potions or campfires that provide health regeneration will help keep you in the fight.
Once its health drops to 0, the Destroyer will be defeated and drop loot including Souls of Might, Hallowed Bars and sometimes a rare pet or mount.
Skeletron Prime
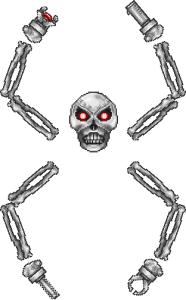
Think Skeletron was tough? Wait till you meet his hardmode upgrade! Skeletron Prime is a menacing mechanical skull with four arms that each wield dangerous weapons. Focus on one arm at a time, starting with the Prime Laser arm which does the most damage. A good arena, buffs like Ironskin and regeneration potions are key. Claim your Souls of Fright and Megashark when you emerge victorious!
The Battle Arena
Set up a long flat area, at least 250 blocks, to give yourself plenty of room to manoeuvre. Place heart statues on timers for some health boosts during the fight. Stock up on buff potions like Ironskin, Regeneration and Swiftness to give yourself an edge.
Weapons of Choice
The Megashark with Ichor or Cursed Bullets is ideal for continuous damage. Have a full stack of Light Discs on hand too, and alternate between the two for maximum firepower. With Palladium armour equipped, you’ll have solid defence and health regeneration.
The Winning Strategy
Hit Skeletron Prime with Ichor or Cursed Arrows to lower its defence, then fly up and away as it spins towards you. Circle around and bombard it with bullets and discs while dodging its arms and head. Focus your attacks on one limb at a time until destroyed.
Skeletron Prime’s arms each have different abilities, so take them out strategically. The Laser arm fires deadly beams, so destroy it first. The Vice arm grabs you, then the Saw arm cuts you up, so eliminate those next. The Cannon arm launches exploding skulls - watch out! Once the arms are down, unload everything you’ve got on the head to defeat this mechanical monster once and for all!
With the right preparation and persistence, you'll send Skeletron Prime to the scrapyard.
Mechdusa
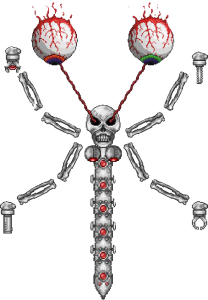
You are now ready to take on Mechdusa, the ultimate mechanical menace! This amalgamation of Skeletron Prime, The Twins, and The Destroyer is one tough boss, but with the right gear and strategy you’ll emerge victorious.
Gear Up
You’ll want to equip yourself with Hardmode armour like Mythril or Adamantite, along with weapons that can deal high damage to multiple segments, such as the Onyx Blaster or an Adamantite glaive. Stock up on potions like Ironskin, Regeneration, and Lifeforce to boost your stats.
The Battle Begins
Once you’ve crafted Ocram’s Razor and used it, the fight will commence! Mechdusa immediately starts attacking with The Twins’ laser and cursed flame attacks, so keep moving to avoid them. After a short time, its head will transform into Skeletron Prime and begin spinning at you while launching skulls - dodge and attack the head when it stops spinning.
Next, Mechdusa’s body turns into The Destroyer, launching probes and attempting to ram you. Focus your attacks on the probes to minimise damage, then turn to the body segments. Rinse and repeat between The Twins’ and Destroyer’s attack phases. If at any point the head turns back into The Twins, prioritise dodging the lasers and attacking the head.
With good mobility and high damage, you’ll chip away at this mechanical monstrosity in no time! Once you’ve destroyed all body segments and the head, Mechdusa will be defeated. Congrats, you've earned yourself some sweet loot and mastered this epic battle!
Rewards
You’ll receive Mechdusa's Trophy, the Unreal Ocram's Razor, Souls of Might, and Souls of Sight. You may also get a rare drop of the Mechdusa Mask! Equip it to take on the appearance of this formidable foe and strike fear into the hearts of your enemies.
Mechdusa is one of the most challenging bosses in Terraria, but with the right tactics and equipment, you have what it takes to triumph over this mechanical menace!
Plantera
Time to take on Plantera, the jungle menace! This angry plant boss can be a tricky one, but with the right gear and strategy you'll emerge victorious.
Finding Plantera
First, explore the underground jungle until you come across a pink bulb - that's Plantera's home. Clear an area around it so you have room to manoeuvre, then smash that bulb with your pickaxe! Plantera will burst out in a rage, so be ready for a fight.
Weapons of choice
Bring your best gear for this battle. The Crystal Serpent, Sky Fracture, and Golden Shower are extremely effective against Plantera. Aim for its multiple tentacles to deal damage. The Shadowflame Knife is also handy for setting Plantera on fire. For extra protection, equip Turtle armour and an Obsidian Shield.
The arena
An enclosed arena around the Plantera bulb is ideal. Create a large space and line the walls with platforms so you can jump between levels. Include campfires and heart lanterns for health regeneration. Use the Clentaminator to clear the area of jungle grass and ensure Plantera's tentacles have no way to grab onto walls.
Fighting Plantera
Once Plantera emerges, let the battle begin! Its first form will chase you aggressively, shooting seed projectiles and whipping with thorny tentacles. Focus fire on its tentacles while avoiding its attacks. When it reaches 50% health, Plantera will transform into its second form.
Plantera now becomes more stationary, firing faster and more accurate shots. Continue attacking its tentacles, especially when they are recoiled. Deal enough damage and Plantera will go down, dropping rare loot like the Grenade Launcher and Seedler sword.
Golem
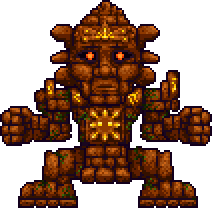
Are you ready to take on the mighty Golem? This giant stone boss guards the Lihzahrd Temple and drops powerful loot, but defeating it is no easy task! To emerge victorious, you’ll need the right gear, a solid strategy, and a whole lot of determination.
Stats
The Golem has seriously high health, defence, and attacks with its multiple arms and in different phases. Your best bet is to build an arena for the fight with platforms at different levels that Golem can’t reach. That way you can jump or teleport between levels to dodge its pounding fists and lasers. Equip a shield for extra defence and a fast melee or ranged weapon to chip away at its health.
Start the Fight
Once you activate the altar, the fight begins! In its first phase, Golem will stomp around and swing at you with its arms. Circle strafe around it while attacking and be ready to dodge its laser eyes. When its arms are destroyed, it enters its second phase. Golem’s head will start spinning and shooting lasers - keep moving! Destroy the head to defeat Golem once and for all.
Rewards
With the right gear and persistence, you'll overcome Golem's defences. And the rewards are well worth it - you'll get a Picksaw to mine Lihzahrd Bricks, a Power Cell to craft a Golem Fist weapon, and a chance at a Stynger, a rare rocket launcher. You did it! Golem has been defeated.
The Golem may seem impossible, but with the right tactics and tools at your disposal, you can send it tumbling down.
Duke Fishron
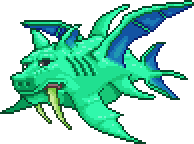
Time to take on Duke Fishron, one of the strongest bosses in Terraria! This mutant fish boss puts up a serious fight, but with the right gear and strategy you'll be reeling in victory in no time.
Fighting the Duke
Duke Fishron's charging attack is his primary attack and can be difficult to dodge without proper mobility accessories, so equip items like wings, a dash accessory like the Shield of Cthulhu, and speed potions. Moving sideways quickly relative to where Duke Fishron is aiming will help you evade his charging assault. Using ranged weapons is the easiest way to defeat Duke Fishron since he zips through the sky rapidly. The Megashark, Chlorophyte Shotbow with holy arrows, and Tactical Shotgun are all great choices.
Tips for victory
The trick is to keep your distance while unleashing a constant barrage of bullets, arrows and shells on the menacing monster. Circle strafe around Duke Fishron while firing at him to avoid his charges. When he does his sharknado attack, get out of its path immediately! The little sharks it spawns will swarm you and deal major damage.
Once Duke Fishron reaches half health, break out the big guns. The Rocket Launcher, Snowman Cannon, or Flamethrower will melt through the remaining health. If playing multiplayer, have one player distract Duke Fishron while the other blasts away at him. Teamwork makes the dream work!
Rewards
When Duke Fishron has been defeated, you'll receive extremely valuable loot like the Tsunami bow, Razorblade Typhoon, and Fishron Wings. Congratulations, you've conquered one of the most formidable bosses in the game! With Duke Fishron out of the way, no enemy stands a chance against your firepower. Time to dominate the rest of your Terraria world!
Empress of Light
The Empress of Light is one seriously epic boss battle in Terraria that will really test your skills! To summon this powerful opponent, you need to defeat a Prismatic Lacewing, a rare glowing critter that spawns in the Hallow at night. Once you defeat one of these beauties, the Empress will emerge in all her rainbow-coloured glory!
Gear up!
Before even attempting this fight, make sure you have endgame gear like Beetle Armour, an array of potions for every occasion, and weapons that can dish out major damage fast like the Terrarian Yo-yo. You'll need all the help you can get!
Light 'em up!
The Empress only spawns during the day, so you have a limited window of 7:30am to 12 midnight to challenge her might. Her attacks are light-based, including prismatic bolts and an everlasting rainbow beam that will decimate your health bar in seconds if it hits you.
On the move!
A tried and tested tactic is to lay down Minecart Tracks in a large loop arena and keep riding around to avoid her homing attacks. Dodge up, down and side to side while sailing around the loop. Stop occasionally to unleash a volley of your own attacks when she's recovering, then get moving again! Rinse and repeat.
Watch the skies!
In her second form, the Empress takes to the skies in a flash of rainbow colours. Continue circling the tracks while peppering her with ranged attacks and spells. Time is of the essence here - defeat her before the day ends or she will enrage and unleash devastating light tornadoes!
Lunatic Cultist
The Lunatic Cultist is one of the most exciting boss battles in Terraria! Once you’ve defeated the Golem, this mysterious figure will appear outside the dungeon. Defeating the Lunatic Cultist summons the Celestial Pillars, which are portals to the Moon Lord. This boss is no pushover, but with the right strategy and gear, you’ll be on your way to the final showdown in no time!
Start the Battle
Head to the dungeon entrance. The Lunatic Cultist will spawn there, surrounded by his cultist followers. Talk to the Cultist to begin the fight! His attacks include:
- Summoning phantasmal dragon projectiles that swoop down to attack you. Dodge and weave between these!
- Teleporting around and firing shadowflame projectiles. Keep on the move to avoid these dark spheres.
- Summoning cultist archers that rapid-fire shadowflame arrows. Take out these minions quickly before they overwhelm you.
To Victory!
The key to winning this fight is mobility - keep dodging and circling the Lunatic Cultist while attacking from range. Once you’ve witted him down to 2/3 health, he’ll summon an Ancient Vision to aid him. Destroy this summon as fast as possible, as it buffs the Cultist’s attacks. Repeat this process when his health hits 1/3.
With the right equipment like vortex armour, an influx waver, and potions like ironskin and regeneration, you’ll gain the upper hand. Keep attacking until the Lunatic Cultist is defeated! His death animation is very dramatic - watch as his body fades into shadows.
Moon Lord
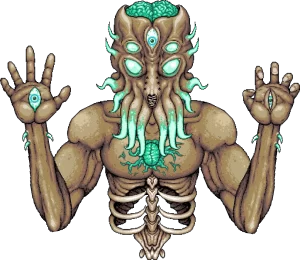
The Moon Lord is the final boss in Terraria and defeating him allows you to enter endgame! This celestial beast is no pushover, but with the right strategy and equipment, you’ll be looting his treasure in no time.
To battle the Moon Lord, you’ll first need to defeat the Lunatic Cultist boss at the Dungeon. Once defeated, the Lunar Events will begin, culminating in the Moon Lord boss fight. Here are some tips to defeat this formidable foe:
- Build an arena. Construct a shelter with heart statues, heart lanterns and honey for health regeneration. Include campfires for health regeneration and sunflowers for increased movement speed.
- Get the best gear. The Daybreak is the most effective weapon against the Moon Lord. You’ll also want solar flare armour, ankh shield, celestial shell and worm scarf for defence and buffs. Stock up on healing and buff potions too!
- Focus the eyes. The Moon Lord’s main weapons are his two eyes and forehead eye. Destroy these first to disable his deadliest attacks like the death ray and phantasmal eyes. Use homing weapons for precise targeting.
- Dodge and weave. Employ swift evasive manoeuvres to avoid the Moon Lord’s attacks like the phantasmal bolts and death ray. Grappling hooks can quickly move you out of harm's way.
- Have a nurse nearby. A nurse can provide instant healing during the fight. Build a house for her in your arena so you can teleport to her when your health gets low.
- Buff up. Activate all your buffs like regeneration, ironskin, endurance, lifeforce, and any others you have before summoning the Moon Lord. The extra defence and health will increase your chances of victory.
With the right preparation and strategy, you can defeat the Moon Lord and unlock Terraria’s most powerful gear.

