
I. Introduction
Hey there, fellow Minecraft enthusiasts! If you've clicked on this guide, chances are you're ready to dive into the magical and oh-so-potent world of potions in Minecraft. Whether you're a veteran looking to enhance your knowledge or a rookie eager to learn the ropes, you've come to the right place.
In the world of Minecraft, where dangers lurk around every corner and the difference between survival and respawn often hangs by a thread, potions can be your best ally. They can make you run faster, jump higher, heal quicker, or even breathe underwater. Magic stuff, right?
In this guide, we're going to demystify the art of potion brewing, exploring everything from the basics to advanced tips and tricks. So, grab your brewing stand and let's get started!
II. The Basics of Potion Brewing
Before we dive into brewing our first batch of potions, let's get familiar with the key components of the potion-making process.
First up, the brewing stand. This nifty block is where the magic happens. You can craft one using three cobblestones and a blaze rod (you did defeat that Blaze in the Nether, right?). The brewing stand interface has slots for up to three potions and one for a brewing ingredient.
Next, we need glass bottles filled with water - the blank canvas of any potion brewer. Simply craft some glass bottles (three glass blocks in a 'V' shape should do the trick) and click on a water source to fill them up.
Then, we have the all-important nether wart. This funky-looking fungus is crucial for brewing just about every potion in the game. It turns a water bottle into an 'Awkward Potion' - the base for most brews.
Lastly, you'll need blaze powder to fuel your brewing stand. Grab that blaze rod you used to make your stand, pop it in your crafting grid, and voilà - blaze powder.
Armed with your brewing stand, water bottles, nether wart, and blaze powder, you're ready to start your potion brewing journey. Onwards, to magical concoctions!
(Next sections to follow include: Types of Base Potions and Their Uses, Brewing Different Potions, Enhancing and Modifying Potions, Potion Throwing vs. Drinking, Potion Tips and Tricks, and the Conclusion.)
III. Types of Base Potions and Their Uses
In the potion brewing world, not all potions are created equal. The type of base potion you start with can significantly impact your brewing outcomes. Let's explore these magical foundations:
A. Awkward Potion
This potion is the real MVP in the potion brewing game. Made by adding a Nether Wart to a water bottle, it doesn't do anything by itself but serves as the stepping stone to nearly all the beneficial potions in Minecraft. This potion is the blank canvas that awaits your magical touch.
B. Thick Potion
Brewed by adding Glowstone Dust to a water bottle, the Thick Potion is a little bit of a red herring. It's called 'thick,' but it doesn't do anything in particular and doesn't serve as a base for any other potions. It's the brick wall of your potion brewing journey, so don’t waste your glowstone dust here!
C. Mundane Potion
This is what you get when you add pretty much anything besides Nether Wart or Glowstone to a water bottle. Like the Thick Potion, the Mundane Potion is a bit of a brewing dead end. It can only be used to make a Potion of Weakness, so unless you're planning to make a lot of those, you're better off sticking to Awkward Potions.
D. Potion of Weakness
This one's unique. You can make a Potion of Weakness two ways: either by adding a Fermented Spider Eye to a water bottle, or by adding one to an Awkward Potion. This is the only brew that doesn't require a Nether Wart. Handy if you're short on warts and need to fend off melee attackers or cure zombie villagers!
IV. Brewing Different Potions
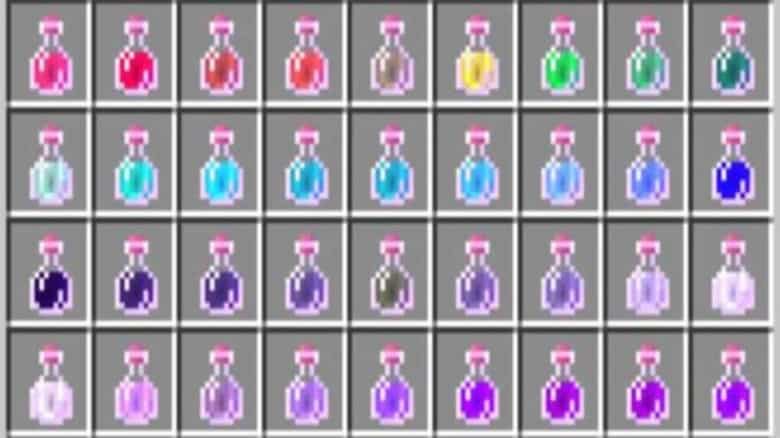
Now that you've got your base potions down, it's time to get creative. Depending on the ingredient you add to your Awkward Potion, you can brew a variety of useful concoctions to aid your Minecraft adventures. Let's explore a few:
- Potion of Healing: Add a glistering melon slice to your Awkward Potion, and you've got yourself a healing brew. Perfect for when that creeper gets a little too close for comfort.
- Potion of Fire Resistance: Accidentally step into some lava or playing with Blazes? A Potion of Fire Resistance, made with magma cream, will be your best friend.
- Potion of Swiftness: Need a speed boost to outrun those pesky mobs or just want to get around faster? Add sugar to your Awkward Potion and let the world whizz by.
These are just a few examples of the magic you can brew. From strength to water breathing, the possibilities are vast and exciting.
In the next section, we will explore enhancing and modifying potions, potion throwing vs. drinking, and some pro tips and tricks for brewing success. Keep your brewing stand at the ready!
V. Enhancing and Modifying Potions
Alright, you've got your basic potions down, but what if I told you there's a way to amp up their effects or even change them entirely? Well, you're in luck! Let's explore potion enhancement and modification:
A. Enhancing Potion Potency with Glowstone Dust
Adding Glowstone Dust to a potion can enhance its effect, making it more potent. For instance, adding Glowstone Dust to a Potion of Healing creates a Potion of Healing II, which restores more health than its predecessor. But remember, enhancing a potion's effect usually decreases its duration, so use this wisely!
B. Increasing Potion Duration with Redstone Dust
Want your potions to last longer? Add some Redstone Dust! This will increase the duration of your potion's effect, allowing you to enjoy those benefits for a little longer. This is particularly useful for potions like Fire Resistance or Swiftness where you might want that extra bit of time.
C. Creating Negative Effects with Fermented Spider Eye
Feeling a little mischievous? Try adding a Fermented Spider Eye to your brews. This will generally create a potion with a negative effect. For example, if you add a Fermented Spider Eye to a Potion of Swiftness, you'll get a Potion of Slowness. Or, add it to a Potion of Healing, and you'll brew a Potion of Harming. Who knew brewing could be so wickedly fun?
VI. Potion Throwing vs. Drinking
Up until now, we've been focusing on drinkable potions, but did you know you can also throw them? Let's talk about Splash Potions and Lingering Potions:
A. Splash Potions
By adding Gunpowder to any drinkable potion, you can create a Splash Potion. These can be thrown, affecting not only you but also any mobs or players in the splash radius. This is particularly useful for healing or boosting your comrades in a multiplayer game, or for applying negative effects to a group of mobs. Watch out, creepers!
B. Lingering Potions
Want your effects to stick around a little longer? Try brewing a Lingering Potion. By adding Dragon's Breath to a Splash Potion, you create a Lingering Potion. When thrown, these create a cloud that gives the potion's effect to anyone who walks into it. Talk about leaving a mark!
VII. Potion Tips and Tricks
By now, you've become quite the brewmaster, but to round off your potion knowledge, here are a few pro tips:
- Always keep a stock of Nether Warts: You don't want to miss out on brewing a life-saving potion because you ran out of this crucial ingredient.
- Don’t forget about Potion of Water Breathing: These potions, brewed using Pufferfish, are a must-have for exploring ocean monuments or underwater ruins.
- Use Potion of Night Vision for exploring dark areas: Brewed with a Golden Carrot, this potion will make your spelunking adventures much easier.
Stay tuned for the conclusion of our magical potion brewing journey up next!
VIII. Conclusion: The Magic of Potion Brewing
Well, folks, we've brewed, enhanced, thrown, and drank our way through the captivating world of potions in Minecraft. From the humble beginnings of a water bottle to the potent final products of Healing II or Lingering Potion of Strength, there's no denying the thrill and practicality that comes with mastering potion brewing.
Potions add a whole new layer of depth and strategy to your Minecraft adventures. Need a speed boost? Brew a Potion of Swiftness. Planning an underwater excursion? Don't forget your Potion of Water Breathing. Walking into battle? Arm yourself with a Splash Potion of Harming.
Remember, fellow Minecrafters, the key to potion brewing, as with so many things in this game we love, is experimentation. So, don't be afraid to try different combinations, explore the vast range of effects, and find what works best for your playstyle.
Whether you're out exploring, defending your base from mobs, or simply trying to survive in the grand world of Minecraft, potions can be your best friend. So, gear up, stock up on those Nether Warts, and start brewing.
What's more exciting than brewing potent potions and exploring the limitless world of Minecraft? Doing it with your friends on your very own server, of course! With GTXGaming, you can rent your own Minecraft server and embark on this spellbinding journey together. Challenge each other to brew the most complex potions or work as a team to stockpile your potions for your next big adventure. GTXGaming's servers are reliable and user-friendly, making it a breeze to set up your Minecraft world and get straight to the brewing stand. Discover the thrill of shared potion brewing today with GTXGaming. Check out GTXGaming's Minecraft server hosting page for more information. Get ready to brew, share, and conquer together! Happy group brewing!
May your adventures be exciting, your battles victorious, and your potions potent. Happy brewing, and as always, happy gaming!