



 DayZ
DayZ Palworld


 Enshrouded










I want my own Vintage Story server
Your own PC or ours, the first settings and getting your friends in.
Start with the basics
Popular game servers
Your panels
Vintage Story knowledge hub
Everything you need to run a Vintage Story dedicated server for your group: your own PC or a rented server, serverconfig.json, playstyles and world settings, the whitelist and roles, mods from the official Mod DB, updates, backups and RAM. Written by the team that hosts them.
No guides match your search. Try a shorter word, or browse a topic above.
Not sure where to begin? Choose the one that sounds like you.
Your own PC or ours, the first settings and getting your friends in.
Start with the basicsMod DB installs, playstyles, world settings and player roles.
Mods and settingsRAM and slots, safe updates, backups and running a public server.
Performance guidePrefer to read it in order? 14 short chapters, about 27 minutes in all, from your first world to a busy modded community server.
Start readingServer details, SFTP, logs, stats, co-admins, FAQ
6 guides
Good to knowSince version 1.20 a dedicated server only admits whitelisted players: whitelist your friends before they try to join.
Mod DB installs, config files, File Manager
2 guides
Good to knowMods marked server side or both on the Mod DB are offered to players automatically when they join; client-side mods each player adds for themselves.
Scheduled restarts, backups, downloads, reinstall
4 guides
Good to knowAutomatic backups run alongside your server's restarts, so keep at least one Scheduled Restart a day.
RAM, slots, CPU, hardware, switching game, donations
6 guides
Good to knowAnego Studios estimates 1 GB of RAM plus 300 MB for every player online, so the 5 GB included with every GTX server covers about 10 players.
The complete guide
/op yourname, then /player friendname whitelist on for each friend (whitelist and roles)./moddb install and a mod's ID to install it straight from the official Mod DB; players are offered the server's mods when they join (how to add mods).Anego Studios' own multiplayer and self-hosting page lists the ways to play Vintage Story together. The quickest is Open to LAN: start a single-player world, open it to your network and others connect to your address. The world is only online while you are playing. A dedicated server is a separate program, VintagestoryServer.exe, that runs the world on its own with no game window open, so friends can play whenever they like. A rented server is that same dedicated server, run for you in a datacentre with a control panel on top.
The dedicated server costs nothing extra. On Windows it is installed next to the game itself; for Linux, Anego offers a server-only download. Anego's page also describes an "Open to Internet" option that tries to open a route through your router automatically (UPnP) and gives it about a 50% chance of working; when it fails, you forward the port on your router by hand.
Vintage Story is sold on vintagestory.at, not on Steam, and the game runs on Windows, macOS and Linux. By default a server checks that every player who joins is a registered, logged-in buyer of the game (VerifyPlayerAuth in serverconfig.json), so each friend needs their own account. There is no console version: Anego's FAQ says it hopes to bring the game to consoles some day.
A player's game and the server must run the same version, or the player cannot join. When we checked on 13 October 2026, the current stable release was Vintage Story 1.22.7, released on 16 August 2026. Anego builds a major update roughly every 5 to 9 months, and mods made for an older version may not work with a new one, so updates are something you plan rather than click past (how to check the version and update safely).
Running your own Vintage Story server is free if you have a spare machine, and it teaches you how the server works. The official dedicated server guide on Anego's wiki covers Windows step by step:
VintagestoryServer.exe sits next to Vintagestory.exe, by default in %AppData%\Vintagestory.VintagestoryServer.exe and add --dataPath="C:\path\to\VSserverData" to its target, so server saves and settings stay apart from your single-player ones.VintagestoryServer.exe through the Windows firewall with an inbound rule for that program.42420 on your router for TCP and, since version 1.20, for UDP as well. Anego's troubleshooting page advises separate rules for each protocol.Dedicated Server now running on Port 42420 and all ips! means it is ready. Friends add your public IP address in the Multiplayer menu.On Linux the same guide runs the server as a background service: install the .NET runtime the game version needs (.NET 10 for 1.22, .NET 8 for 1.21), create a separate user (Anego strongly recommends never running the server as root), download the vs_server_linux-x64 archive from your account's downloads page, set USERNAME, VSPATH and DATAPATH in server.sh, open port 42420 for TCP and UDP, and start it with server.sh start. Anego's self-hosting page adds that a Linux server which crashes from running out of memory may need sudo sysctl -w vm.max_map_count=262144.
Hardware is the other half. Anego's "rough, conservative estimate" for a normal survival world where players spread out is 1 GB of RAM plus 300 MB per player, 4 CPU threads, and a CPU frequency of 1 GHz plus 100 to 150 MHz per player (the wiki guide and the self-hosting page give slightly different per-player figures). Running the game on the same machine means both share it.
Free and instant, ideal when everyone plays at the same time as the host. The world goes offline when the host stops playing, and players outside your home still need a port opened or a VPN.
Free software, full control and a good way to learn. But the machine stays on around the clock, you forward ports, update, restart and back up by hand, and your home address is shared with everyone who joins.
Online 24/7 without your PC, set up when you order, with a control panel for the config file, mods, playstyles, updates, restarts and backups, a datacentre connection with DDoS protection and support when something breaks. It costs a monthly fee, with no contract.
Our view after hosting game servers since 2008: if your group always plays together with the host, Open to LAN is fine. Run a dedicated server when the world should keep going while the host is away, when friends play at different times, or when you want mods, roles and a whitelist that do not depend on one player's PC. Every GTX Vintage Story server includes up to 5 GB of RAM; see our Vintage Story server hosting plans for current prices and locations.
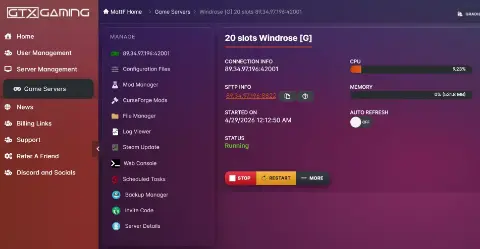
On a GTX server the dedicated server is installed for you the moment you order, with the slots, RAM and location you picked. Everything else happens in the game panel at gamepanel.gtxgaming.co.uk, with the login from your welcome email:
serverconfig.json in the Config Editor or Text Editor, save, then START (the settings that matter). Larger files, such as a world or a mod pack, go in with the File Manager or SFTP./op yourname, then whitelist each friend with /player friendname whitelist on.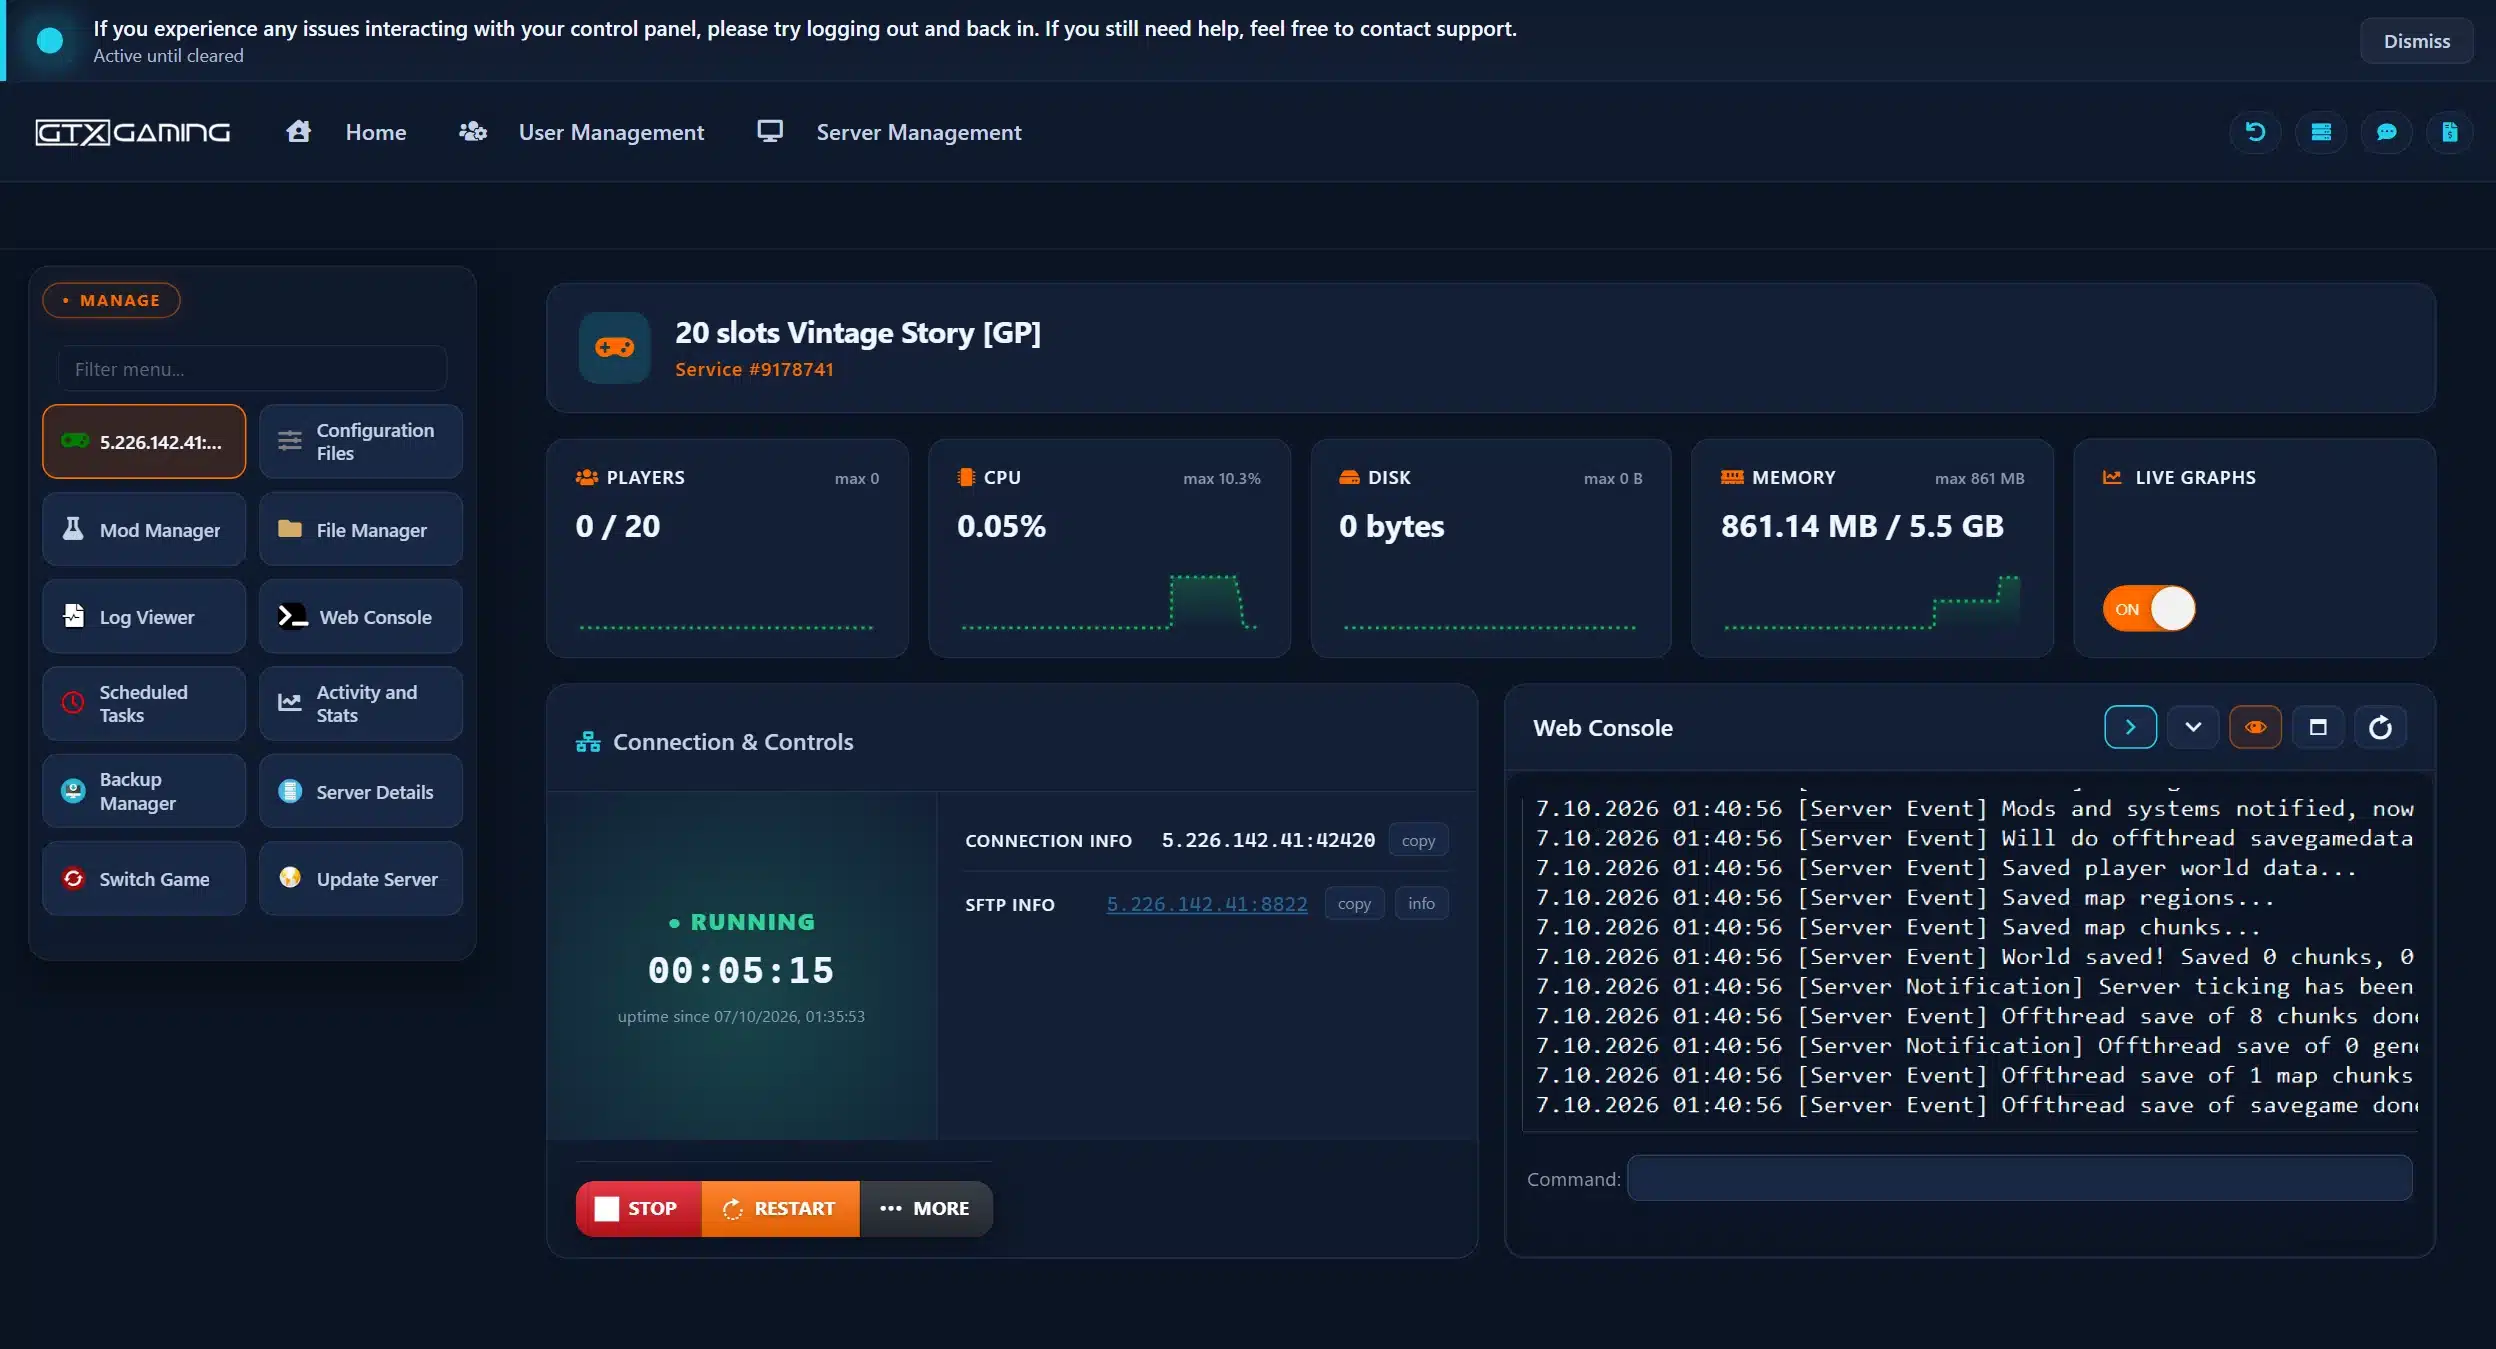
serverconfig.json only while the server is stopped. Game servers often write their settings back to the file when they shut down, which quietly undoes your edits.Every server setting lives in one file, serverconfig.json, in the server's data folder; the world's own rules sit in its WorldConfig section. Anego's wiki keeps the full list of keys with their defaults for version 1.22. Changes to the file take effect when the server starts again, and many settings can also be changed while it runs with /serverconfig in the console. The ones most server owners touch:
ServerName and ServerDescription: what players see in the public server list. The name must be 4 to 80 characters if you advertise the server.WelcomeMessage: shown to each player on joining; {0} becomes their name. Never set it to null (the wiki warns that clients crash); use "" to switch it off.Password: null means no password. Or run /serverconfig password yourpassword (no spaces) and /serverconfig nopassword to remove it.WhitelistMode: 0 is the default (on for dedicated servers), 1 off, 2 on (details).MaxClients: the player limit, 16 by default. On a GTX server your slot count comes with your plan: change it in the Client Area and restart (slots guide).DefaultRoleCode: the role new players get, suplayer (survival player) by default.AdvertiseServer: off by default since 1.20; switch it on to appear under "Browse public servers".AllowPvP, AllowFireSpread and AllowFallingBlocks: player combat, fire spread and block gravity, all on by default.PassTimeWhenEmpty: false by default, so the in-game calendar stops while nobody is online. Set it to true if crops and seasons should move on without players.MaxChunkRadius: the highest view distance a player may load, 12 by default. Higher values need more RAM.ModPaths: where the server looks for mods. Keep the first entry, "Mods": it loads the base game.Leave ConfigVersion alone: the game uses it to migrate the file between versions. The file is JSON, so every text value needs quotation marks and every line but the last in a block ends with a comma; one missing comma is enough to stop the server reading it.
serverconfig.json on your own PC. If an update or a typo breaks the file, you can paste your settings straight back in.A playstyle is a preset for a whole world. Anego's wiki describes the five presets as follows:
The playstyle and the world generation settings apply when a world is created. The official World Configuration page recommends the easy route for a custom world: create it in single player with the Customize button, then copy the save file to the server (how). Setting the world up in serverconfig.json works too, but only before the world exists.
Most rules can still be changed later with /worldconfig name value (and /worldconfig name shows the current value). Commands are case-sensitive, and the server should be restarted after a change. Some useful ones from the official list:
/worldconfig temporalStorms sometimes: how often temporal storms come, from off and veryrare to veryoften./worldconfig deathPunishment keep: players keep their inventory on death (drop is the default)./worldconfig playerlives 3: lives before a player can no longer respawn; -1 is unlimited./worldconfig daysPerMonth 12: longer months make the seasons pass more slowly./worldconfig creatureHostility passive: aggressive, passive or off./worldconfig foodSpoilSpeed 0.5 and /worldconfig toolDurability 2: food lasts twice as long, tools last twice as long./worldconfig allowMap false: switch off the world map for a harder server.A few settings only work while a world is being created, among them the starting climate, the grace timer before hostile creatures spawn, the climate distribution and the world size. To change those, create a new world.
Since version 1.20 a Vintage Story dedicated server whitelists players by default: only people you add can join. So on a brand new server, the whitelist is the first thing to check when a friend cannot get in. The usual order:
/op yourname, using your game account name. It is short for /player yourname role admin./player friendname whitelist on for each player, spelled exactly as their account name. No restart is needed./serverconfig WhitelistMode off lets anyone with the address (and the password, if you set one) join. Anego's guide calls the whitelist significantly more secure than a password.Every player has a role, set with /player name role rolecode. The defaults in serverconfig.json:
suvisitor and crvisitor: can visit and chat but not use, place or break anything (the creative visitor can also fly).limitedsuplayer and limitedcrplayer: can build only in areas they are permitted to.suplayer: the normal survival player and the default role; can build in unprotected areas and claim up to 8 chunks of land.crplayer: a creative player who can build everywhere and fly.sumod and crmod: moderators who can build everywhere and kick and ban players.admin: all privileges, including making other players admin.For a public server, set DefaultRoleCode to suvisitor so newcomers can look around but not touch anything until you promote them with /player name role suplayer. Give helpers a moderator role rather than admin.
/kick name reason, /ban name reason and /unban name./list clients shows who is online; /list banned shows the ban list./announce message sends a message to every player, for example before a restart./land manages land claims, the game's own protection against griefing.Anego's wiki notes its command list is not re-checked on every update and points to the in-game command handbook, opened with .chb, as the most current reference.
/op. People who should help run the server itself, such as starting it, editing files or restoring a backup, get a panel sub-user with only the permissions they need (create a sub-user).Vintage Story was built with modding in mind, and the official Mod DB listed 10,507 mods when we checked on 13 October 2026. Each mod on it is marked as client side, server side or both. There are two ways to put one on your server.
toolsmith_1.0.12.zip means the ID is toolsmith. If the website does not show the right ID, search from the console with /moddb search keyword./moddb install toolsmith. The server downloads it straight from the Mod DB; nothing to upload or unzip. To install one particular release, add its version number after the ID.Two more commands keep the list tidy: /moddb list shows what is installed and /moddb remove modid uninstalls a mod (restart afterwards). The official command list also has /moddb searchcompatible modid, which only shows releases that fit your server's game version. Our support article has the same steps with a short video (install mods on your Vintage Story server).
Download the mod's zip from the Mod DB and put it, still zipped, into the server's Mods folder: on GTX with the File Manager or SFTP. Anego's wiki says this is best done while the server is offline; the mod loads when the server starts. On your own server, the folders the server reads are listed under ModPaths in serverconfig.json.
Usually nothing. When a player joins a modded server, the game offers to download the server's mods into a folder for that server (ModsByServer). That covers mods marked server side or both; purely client-side mods, such as some interface mods, each player installs for themselves if they want them.
/bir, for that case. Take a backup before you remove a mod from a world you care about.When we checked on 13 October 2026, the current stable version of Vintage Story was 1.22.7, released on 16 August 2026 (Anego called it "Auction house upgrades"). It followed two server safety patches in July 2026, 1.22.4/1.22.5 and 1.22.6, which Anego recommended server owners install to prevent griefing. The next major update, 1.23, focuses on combat; Anego's June 2026 development update gave no release date.
Game Version: v1.22.7 (Stable). On GTX, open the Log Viewer (view your server logs).You do not have to update the moment a release comes out. If a mod your world depends on is not ready yet, the server can stay on its current version as long as your players run the same one: Anego's troubleshooting guide notes that players can download an earlier version of the game from the downloads in their account at vintagestory.at. Do not wait too long on a public server, though: patches such as 1.22.4 to 1.22.6 closed exploits that griefers use.
A whole Vintage Story world is one file with the extension .vcdbs in the server's Saves folder. The server uses default.vcdbs unless SaveFileLocation in serverconfig.json points somewhere else. Anego's troubleshooting guide says a save can grow to a few GB, depending on how much of the map has been explored.
Saves folder (%AppData%\VintagestoryData\Saves on Windows)..vcdbs file to the server's Saves folder: on GTX with the File Manager or, for big worlds, SFTP (connect with SFTP).default.vcdbs, or set "SaveFileLocation" to its name, for example "./data/Saves/MyWorld.vcdbs" as in Anego's guide.The server saves the world automatically every few minutes; Anego's troubleshooting guide notes each autosave can cause a second or two of lag and strongly recommends keeping it. Before you stop a server by hand, /autosavenow saves straight away. The official command list also includes /genbackup, which writes a full copy of the save to the server's backups folder without pausing the game.
On GTX, automatic backups are stored offsite and run alongside your server's restarts, so keep at least one Scheduled Restart a day (set up restarts). We normally keep backups for up to 6 months. The Backup Manager, which has its own password shown on its button or under Server Details, lets you download a dated backup to your PC (download your backups) and restore one.
DieBelowDiskSpaceMb). On a big, well-explored world, keep an eye on disk space.Anego's estimate of 1 GB of RAM plus 300 MB for every player online works out like this for a normal survival world:
Anego calls these conservative, but mods and a well-explored world add to them. Every GTX Vintage Story server includes up to 5 GB of RAM, which covers about 10 players in a normal survival world. Our sizing advice beyond that: 8 GB for 20 players or a modded world, 12 GB for around 30 players or a big mod list, 16 GB for 40 players and well-explored worlds, 24 GB for public servers with 60 or more players, and 32 GB for a full 100-slot server or the biggest modded worlds. Plans run from 10 to 100 slots; pick one slot for each player online at the same time.
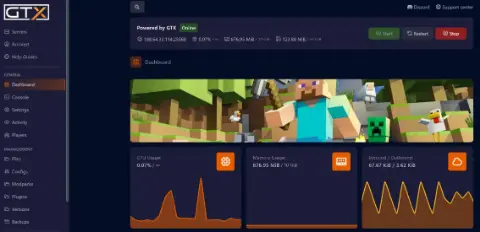
The memory and CPU cards and the live graphs on your panel's main page show what the server really uses (server statistics), and /stats in the console shows tick rate and memory use. If memory keeps climbing towards your limit, add RAM in the Client Area (change your RAM).
MaxChunkRadius caps how far players can load the world; a lower value saves RAM on a busy server.Start with the server log: the Log Viewer on GTX shows why a server stopped or refused a player. Common problems and what to check:
/player name whitelist on./moddb remove modid, or delete its zip from Mods while the server is stopped) and start again. Anego's guide notes that a crash report whose top line mentions patch usually points to a mod. If the world itself is damaged, restore the last backup from before the change.serverconfig.json: stop it, edit, save, start.WelcomeMessage set to null.A Vintage Story dedicated server is private by default (whitelisted and not advertised), but opening yours to a community is a few settings away:
AdvertiseServer to true with a ServerName of 4 to 80 characters and a ServerDescription; the server then appears under "Browse public servers" in the game. Anego said in June 2026 that it is also building a web version of the public server list.DefaultRoleCode to suvisitor and promote players you trust (roles). MaxClientsInQueue lets players wait in a queue when the server is full./serverconfig antiabuse switches on the game's anti-abuse checks. Since 1.22.6 the anti-abuse system can also ban players who break blocks in suspicious bursts, unless anti-abuse is off. Install Anego's safety patches promptly.play.yourdomain.com pointing at your server's IP (without the port) lets players type the name instead of the IP; if your port is not the default 42420, they add it after the name. Anego's wiki also shows an SRV record (_vintagestory._tcp) that lets players leave the port off.Anego Studios' FAQ sets out what server owners may charge for. Donations are fine, and so are subscriptions for access to a server. Paid perks are fine only if they are purely cosmetic: anything that gives a player an in-game advantage is not allowed unless it benefits all players equally. Ads outside the game are fine, in game only within reason. Anego says it may delist servers that ignore the guidelines. If your community wants to chip in for the server, GTX's Clan Pay gives you a donation link (set up Clan Pay).
The dedicated server comes with the game: on Windows run VintagestoryServer.exe from the game folder (Anego recommends giving it its own data folder with --dataPath), on Linux use the server-only download with server.sh. Forward port 42420 for TCP and UDP, start it, make yourself admin with /op yourname and whitelist your friends. Or rent one: on GTX the server is set up when you order and you manage it from the game panel.
Start the server, open its console (the Web Console on GTX) and type /moddb install followed by the mod's ID from the official Mod DB, for example /moddb install toolsmith, then restart if the mod needs it. You can also upload the mod's zip, unextracted, to the Mods folder. Players are offered the server's server-side and universal mods automatically when they join.
When we checked on 13 October 2026 the current stable release was 1.22.7, released on 16 August 2026; the official news page and the wiki's Version history show the newest one. Take and download a backup, check your mods support the new version, then update: on GTX press Update Server in the panel. Players must update their game to the same version to join.
Yes, as long as your players run the same version: Anego's troubleshooting guide notes that players can download an earlier version from the downloads in their game account. Groups often wait with a major update until the mods they rely on support it. Do not stay behind for long on a public server: patches such as 1.22.4 to 1.22.6 closed exploits used for griefing.
Since version 1.20 dedicated servers only admit whitelisted players: add each friend with /player friendname whitelist on, or switch the whitelist off with /serverconfig WhitelistMode off. Also check that they run the same game version as the server, use the right address and port, and have saved the password in the server's entry if you set one.
Anego Studios estimates 1 GB plus 300 MB for every player online in a normal survival world: about 4 GB for 10 players, 7 GB for 20 and 13 GB for 40. Mods and a well-explored map need more. Every GTX Vintage Story server includes up to 5 GB, and you can add RAM at any time as your group grows.
Port 42420 by default, over TCP and, since version 1.20, over UDP as well. At home you forward both on your router (as separate rules). On a GTX server there is nothing to forward: copy the address and port from CONNECTION INFO in the game panel.
Yes. A world is a single .vcdbs file in your game's Saves folder. Stop the server, upload the file to the server's Saves folder (File Manager or SFTP on GTX), rename it to default.vcdbs or point SaveFileLocation in serverconfig.json at it, install the same mods you used, and start the server.