



 DayZ
DayZ Palworld


 Enshrouded








I want my own Project Zomboid server
Host, co-op or dedicated, Build 42 or Build 41, and the first settings to change.
Start with the basics
Popular game servers
Your panels
Project Zomboid knowledge hub
Everything you need to run a Project Zomboid server your group can rely on: Build 42 or Build 41, your own PC or a rented server, servertest.ini and the sandbox, Steam Workshop mods, admins and the whitelist, restarts, backups and RAM. Written by the team that hosts them.
No guides match your search. Try a shorter word, or browse a topic above.
Not sure where to begin? Choose the one that sounds like you.
Host, co-op or dedicated, Build 42 or Build 41, and the first settings to change.
Start with the basicsSandbox rules, Workshop mods, admins and the whitelist.
Mod and settings guidesPlayer count, RAM, restarts and backups, and what to check first.
Performance guidesRanked by visits from Google Search, July to October 2026.
Prefer to read it in order? 15 short chapters, about 24 minutes in all, from your first start to a busy modded Build 42 server.
Start readingServer details, files, SFTP, logs, FAQ
6 guides
Good to knowCopy the full address from CONNECTION INFO in the panel: every GTX server has its own port, so the game's default 16261 will not reach yours.
Stable, legacy41, 42.19, switching
2 guides
Good to knowWorlds do not move between builds: a Build 41 save stays on Build 41, and Build 42 starts with a fresh world.
Workshop installer, branches, updates
2 guides
Good to knowOn Build 42 every mod ID on the Mods= line starts with a backslash; on Build 41 there is none.
setaccesslevel, access levels, co-admins
2 guides
Good to knowUse the username you joined with, in quotes, not your character's name, and be connected when you run setaccesslevel.
Scheduled restarts, backups, reinstalls
5 guides
Good to knowThe Restart with Messages task warns players at 10, 5, 2 and 1 minute, saves the world, restarts the server and takes a backup.
RAM, slots, CPU, hardware, donations
5 guides
Good to knowThe game defaults to 32 players and warns that more can cause poor map streaming and desync: grow past 32 step by step.
Solo or multiplayer
1 guides
Good to knowA singleplayer character cannot be carried into a multiplayer world: everyone starts fresh on a server.
The complete guide
servertest.ini (the settings that matter), then the world rules in the sandbox file (sandbox settings).setaccesslevel command makes you admin (mods and admin).Project Zomboid gives you two ways to play online with friends. The Host button in the main menu starts a multiplayer server on your own PC while you play, and its Server Memory option sets how much memory that server gets. It is quick for an evening with friends, but the world lives on the host's PC.
A dedicated server is the separate Project Zomboid Dedicated Server program (Steam app 380870) that The Indie Stone publishes for Windows and Linux. It runs the world without a game client, so nobody has to keep Project Zomboid open: the base, the farm and the generator are there whenever anyone in your group logs in. A rented server is that same dedicated server, run for you in a datacentre with a control panel on top.
Build 42 made dedicated servers matter more: The Indie Stone moved the inventory, item transfers, container interactions, loot distribution and all timed actions to the server, so the client only shows the visuals, and added a full anti-cheat suite (Speed, Hit, NoClip, Inventory and more). A strong, always-on server is what keeps that fair and smooth for everyone.
Project Zomboid is still in Early Access, and The Indie Stone ships it in builds. Build 42 went to the Stable branch, the default version on Steam, on 29 July 2026 as version 42.20. The latest Stable update when we wrote this was 42.21, released on 28 September 2026. New updates now go to the Unstable branch first, players test them, and then the same release moves to Stable. These are the branches a server owner meets, all from The Indie Stone's announcements on Steam:
Build 42 Stable (default)
The build every new player gets from Steam, with no beta selected. Use it for every new world and for Build 42 mods. It brought the crafting overhaul, animals, basements, darker nights, three new towns (Ekron, Irvington and Brandenburg) and a map surface twice the size.
Build 41 Legacy (legacy41)
The Steam beta branch that keeps Build 41 alive for old worlds and Build 41 mod lists. It still gets fixes: the 41.78.21 Legacy hotfix came out on 26 August 2026. Players choose legacy41 under Properties, Game Versions & Betas in Steam.
Unstable and 42.19
Unstable is the testing branch for the next update. The 42.19 beta branch only exists so old Build 42 Unstable worlds can be finished, because 42.19 Unstable saves are not compatible with Build 42 Stable.
Two rules decide everything else. Players must run the same build as the server, or they cannot join; since 42.21 the game tells a player who tries to connect to a server on a different version. And worlds do not move between builds: The Indie Stone says Build 41 savegames are not compatible with Build 42, so moving to Build 42 means a fresh world.
How a server picks its branch. On your own machine, choose the branch for the Project Zomboid Dedicated Server tool under Game Versions & Betas in Steam, or add it to SteamCMD, for example app_update 380870 -beta legacy41 validate for Build 41. On GTX, Build 42 and Build 41 Legacy are two separate servers at the same price: you choose one when you order, and you move between them with Switch Game Server in the Client Area, which backs up your current server first (how to switch). To finish an old Build 42 Unstable world, MORE › Change Server Version lets you pick Build 42.19 Unstable. Our Build 42 upgrade and migration guide walks through every path.
Running your own Project Zomboid dedicated server is free if you have a spare PC, and it is a good way to learn how the server works. The official PZ wiki dedicated server guide covers it in full; in short:
login anonymous, then app_update 380870 validate. Do not start the server from Steam itself.StartServer64.bat (Windows) and set the -Xms and -Xmx memory values. The script asks for 16 GB by default; the wiki says to set the memory you want to use, or the server can fail to start with memory errors.StartServer64.bat, or start-server.sh on Linux under its own user, not root. On the first run the server asks you to set the password of the admin account it creates.16261 and 16262 on your router and allow them in your firewall. A second server on the same machine needs two more UDP ports.servertest.ini in Zomboid/Server and the sandbox file next to it, then join with Join › Favorites › Add, your public IP and port 16261.quit command so the world is saved, and update it through Steam after every patch. The developers discourage running it as a Linux systemd service, because a clean save on shutdown is not guaranteed that way.Your own PC or home server
Online: only while the machine is on.
Setup: Steam or SteamCMD, memory flags, config files, router and firewall.
Mods: IDs typed into the settings file by hand.
Backups and restarts: your own scripts.
Your address: shared with everyone who joins.
Cost: free software, plus power, RAM and your connection.
A rented server
Online: 24/7.
Setup: done when you order; name it and start it in the game panel.
Mods: Steam Workshop installer fills in the IDs.
Backups and restarts: scheduled tasks with player warnings, automatic backups.
Your address: a datacentre address with DDoS protection.
Cost: a monthly fee, no setup fee and no contract.
Our view after hosting game servers since 2008: two or three friends with a spare PC can start at home. Rent one when the world must keep running while the host sleeps, when your group plays at different times, or when you run a modded or public server. Every GTX Project Zomboid server includes up to 10 GB of RAM; see our Project Zomboid server hosting plans for current prices and locations.
Your server is created automatically when your order goes through. These are the first steps, taken from our support guides:
gamepanel.gtxgaming.co.uk, with the login from your welcome email. Server Details shows your passwords, ports and other details in one place.GTXGaming.ini: the server name, the server password, the welcome message and the player limit. Save and press START.setaccesslevel "USERNAME" "admin" in the Web Console with the username you joined with (admin and access levels).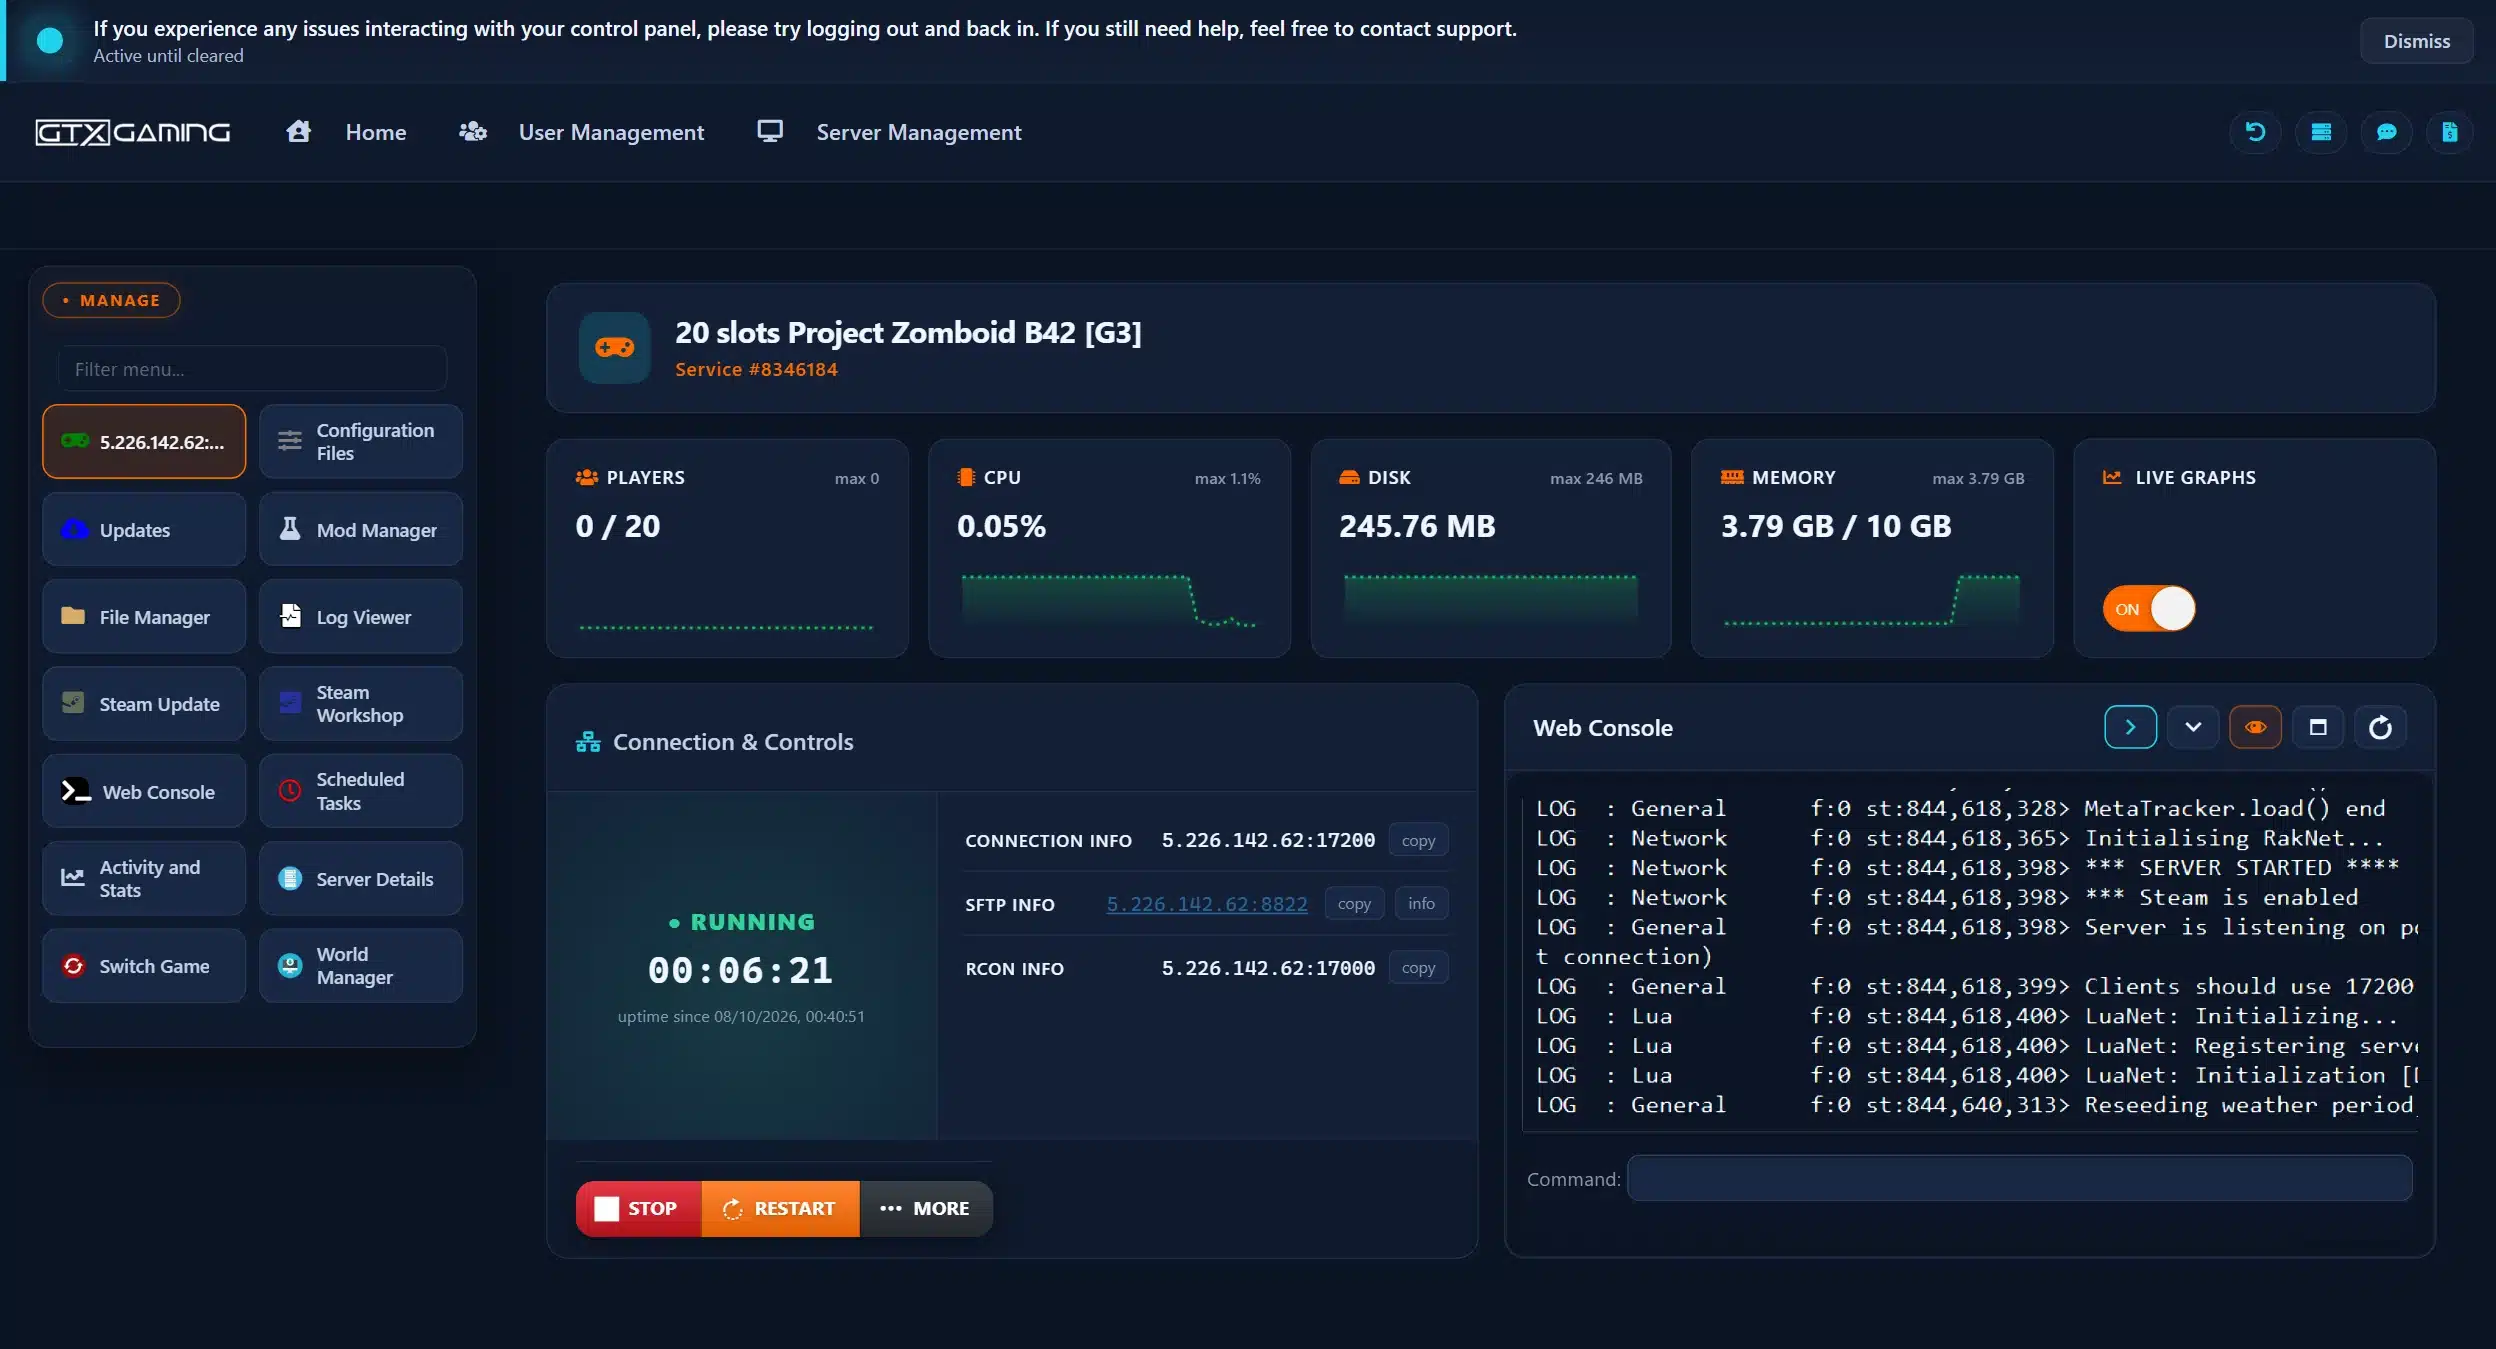
Want a friend to help run it? Create a sub-user for them in the panel, so they get their own login and you never share your password. When the server will not start, Log Viewer and the Web Console show what it is doing.
A Project Zomboid server reads four files, all named after the server. With the default name they are servertest.ini, servertest_SandboxVars.lua, servertest_spawnpoints.lua and servertest_spawnregions.lua, in Zomboid/Server in the user folder; the world itself is saved in a servertest folder under Zomboid/Saves/Multiplayer. Starting the server with -servername changes which files and which save folder it uses. On a GTX server the name is GTXGaming, so you edit GTXGaming.ini and its matching files in Configuration Files, with the Config Editor or the Text Editor.
The .ini file holds everything that is not world rules. The settings most owners change, with the defaults from the official wiki:
PublicName and PublicDescription: the name and description in the server browser.Public (default false): shows the server in the in-game browser. Steam-enabled servers always appear in the Steam server browser.Password: players must know it to join. Leave it empty for an open server.MaxPlayers (default 32): the player limit, not counting admins. See player count before you raise it.Open (default true): set it to false for a whitelist, where only accounts an admin created can join (whitelist).PVP (default true) and SafetySystem: whether players can hurt each other, and whether each player switches PvP on and off for themselves.PauseEmpty (default true): game time stops while nobody is online, so the world does not age while your group is asleep.ServerWelcomeMessage: the first chat message players see after they log in.PlayerSafehouse and Faction: whether players can claim safehouses and create factions.SpawnPoint (default 0,0,0, off): forces every new player to spawn at one set of coordinates.WorkshopItems=, Mods= and Map=: the mod lines (mods).DefaultPort (16261) and UDPPort (16262), plus RCONPort (27015) and RCONPassword: on a GTX server the ports are set for you.Two IDs deserve a backup of their own: ResetID and ServerPlayerID. They tell the server whether a character belongs to this world. If they change, as on a soft reset, every player has to create a new character, so the wiki strongly advises keeping a copy of both.
/showoptions, and change one with /changeoption. Bigger edits are safest in the file, with the server stopped.The world rules live in the sandbox file, servertest_SandboxVars.lua (GTXGaming_SandboxVars.lua on GTX): how many zombies there are and how they behave, loot, the length of a day, when the water and power go off, farming, and much more. A few defaults from the official file, to show what you can change:
LootItemRemovalList stops chosen items spawning, and loot respawn (HoursForLootRespawn) is off by default.The easiest way to build a sandbox is in the game: Host › Manage Settings lets you edit a full set of server settings with menus, and saves the same files you then upload to your server. Spawn points and spawn regions (the towns new players can start in) are in the two other .lua files; map mods add their own spawn regions, and the GTX Workshop installer sets those up where the map supports it.
Build 42 also uses a world seed: it decides where some generated things go, such as basements, how zombies are spread and the wilderness beyond the edge of the map, and you can save and share it to get the same layout in another world.
Project Zomboid mods come from the Steam Workshop, and a server needs three things from each one, all in the .ini file:
WorkshopItems=: the Workshop IDs the server downloads, separated by semicolons.Mods=: the mod IDs to load. One Workshop item can hold several mods, and the mod ID is in the mod's info.txt, not in the Workshop link. On Build 42 every mod ID starts with a backslash (Mods=\FirstModID;\SecondModID); on Build 41 there is none.Map=: the folder name of every map mod the server loads.On a GTX server you do not type any of this. Press STOP, open Steam Workshop in the panel, install the mods and maps you want and press START: the installer adds the Workshop IDs and mod IDs, sets up maps and their spawn regions where the map supports it, and stops duplicates. Where a mod has several branches or variants, the first one loads and the others are listed as a comment above the Mods= line in GTXGaming.ini, ready to switch. Our guide to installing Steam Workshop mods and maps has every step.
Players install nothing: the game downloads the server's Workshop mods when they join, so the first join takes a little longer. When an author updates a mod, players who have the new version cannot join a server still running the old one ("Workshop item version is different"). A restart fixes it, and a scheduled Workshop Update task, for example every 12 hours, stops it happening.
loadstring and loadstream Lua methods to fix security holes, and 42.21 switched them back on after The Indie Stone looked into it further. If a mod broke in August 2026, check for an update.For your own game, Build 42 added an official mod manager, with search, favourites, load order, dependencies, incompatibilities and presets you can share. The Indie Stone has also said that after Build 42 Stable it will release its mapping tools and its animation tool, AnimZed, with an extensive modding guide.
Admin rights in Project Zomboid belong to a player's account on the server, and you hand them out with one command. Join the server first, because the player must be connected, then run it in the server console:
setaccesslevel "USERNAME" "admin", without a slash./setaccesslevel "USERNAME" "moderator" in chat, with a slash.Use the username you joined with, in quotes, not your character's name. The level is saved with the account, so it survives restarts. Not everyone needs full control: admin, moderator, overseer, gm and observer give smaller sets of rights, and our admin guide shows how to take rights away again. Older guides mention grantadmin: use setaccesslevel instead.
Commands admins use most, from the official list (type help for every command your server supports):
/players, /servermsg "text", /save and /quit (save and shut down)./kickuser "name" -r "reason", /banuser "name" -ip -r "reason", /banid SteamID and their unban versions. The 42.21 update fixed a way to join dedicated servers without Steam authentication, which had stopped SteamID bans working, so keep your server updated./teleport "name", /additem "name" Base.Axe 1, /addxp and /createhorde for events, with /invisible (zombies ignore you) and /godmod (you cannot be hurt) while you run them./checkModsNeedUpdate: writes to the log whether a Workshop mod has been updated.Whitelist. Set Open=false and only accounts an admin creates can join: /adduser "username" "password" adds one and /removeuserfromwhitelist "username" takes it away. DropOffWhiteListAfterDeath removes an account after death, so nobody makes a new character. RCON lets tools send the same commands remotely; on GTX the RCON address is under RCON INFO in Connection & Controls.
A Project Zomboid world can take months to build, so a good routine matters more than any setting:
app_update 380870 validate again (with -beta legacy41 for Build 41).Backup.bat runs the server's automatic backups, and the scheduled restart takes one too. Before a big change, such as new mods or a new build, make a manual backup. You can restore any dated backup with Restore Server, or download it to your PC with the Backup Manager; we normally keep backups for up to 6 months.When files are badly broken, MORE › Reinstall gives a clean install. It deletes every server file, including the world, settings and mods, but keeps your backups, so download a backup first.
Already surviving on your own dedicated server or with another host? You do not have to start again:
Zomboid/Saves/Multiplayer) and the four settings files from Zomboid/Server, and take a backup of your new server too.GTXGaming.ini and the matching sandbox and spawn files, and keep the mod lines identical.ResetID and ServerPlayerID with the old server's settings.Moving from another host is free: open a ticket with the old host's SFTP details or a download link to a zipped copy of your save, and our team moves the world and settings for you. Mods usually need installing again on the new server.
Players. MaxPlayers defaults to 32, and the official settings warn that more than 32 players can lead to poor map streaming and desync. The 42.20.3 hotfix improved how servers handle their player limit, with support for up to 254 players, but more players still means more of the map loaded at once. Grow past 32 step by step and watch how the server copes. Choose a slot for every player who will be online at the same time: 10 slots suit a group of friends, 20 a bigger group, 30 to 50 a busy community.
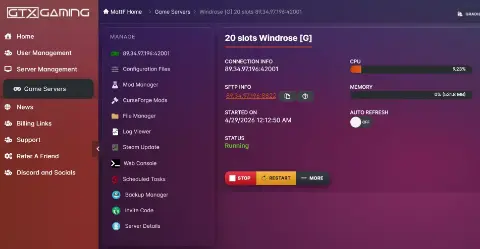
Memory. Project Zomboid's server runs on Java, and the memory it may use is fixed when it starts. On our own 20 slot demo server, a fresh Build 42 world used about 3.8 GB of memory with nobody online, with the CPU near idle. Players, a bigger explored map and Workshop mods all raise that. As a guide:
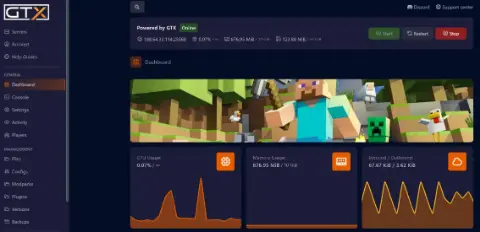
The panel's live graphs show players, CPU and memory, so you can see whether memory is the limit before you pay for more. The Indie Stone's 42.20.3 hotfix fixed several causes of a memory leak that slowed servers down over time, and 42.21 tackled zombie duplication in multiplayer, so an up-to-date server and a regular restart are the cheapest performance fixes. The Indie Stone plans a Build 42 Support Update during the rest of 2026 focused on optimisation.
Most problems come down to the build, a mod or the address. Check these in order:
legacy41 for Build 41, 42.19 for an old Unstable world. Then press Steam Update on the server.WorkshopItems=, Mods= and Map=, check no double semicolons are left, and add them back one at a time. Check that each mod supports your build.Public=true and a PublicName for the in-game browser, and join by IP and port in the meantime. Copy the address from the panel: GTX servers do not use the default port.ResetID or ServerPlayerID changed. Put the old values back from a backup of the settings file.SERVER STARTED before anyone joins.steam_appid.txt contains only 108600, back up your settings and saves, then let Build 42 recreate the Zomboid folder.Still stuck? Open a ticket with your server's IP and port and what you changed last. Our 24/7 team can read the logs with you.
Once the server is running, the game guides help your group decide how to play it, alone or together. These guides are about the game itself, so check how things behave in game after each update: browse the play guides.
Install the Project Zomboid Dedicated Server tool from your Steam library, or with SteamCMD (login anonymous, app_update 380870 validate). Set the memory in StartServer64.bat (the -Xms and -Xmx values), start it, choose the admin password on the first run and open UDP ports 16261 and 16262. Or rent one: on GTX it is set up when you order, and you set the name and password in GTXGaming.ini.
Build 42 for a new world: it has been the default Stable build on Steam since 29 July 2026. Run Build 41 only for an existing Build 41 world or a Build 41 mod list; players then pick the legacy41 branch under Properties, Game Versions & Betas in Steam. Server and players must run the same build.
No. The Indie Stone says Build 41 savegames are not compatible with Build 42, and saves from the old 42.19 Unstable build do not load in 42.20 or later either. Keep the old world on its own branch (legacy41 or 42.19) and start Build 42 with a fresh world.
Join the server, then type setaccesslevel "USERNAME" "admin" in the server console with the username you joined with. On GTX that is the Web Console in the game panel, without a slash. In game, an admin uses the same command in chat with a slash: /setaccesslevel.
Each mod needs its Workshop ID on the WorkshopItems= line and its mod ID on the Mods= line of the server settings; map mods also go on the Map= line. On GTX, stop the server, install the mods from the Steam Workshop button and start it: the installer fills in all three lines. Players download the mods automatically when they join.
You set it with MaxPlayers. The default is 32, and the game warns that more than 32 players can lead to poor map streaming and desync. The Indie Stone's 42.20.3 hotfix improved player limit handling, with support for up to 254 players. GTX Project Zomboid plans run from 10 to 100 slots.
It depends on players, mods and how much of the map has been explored. On our own 20 slot demo server, a fresh Build 42 world used about 3.8 GB with nobody online. Every GTX Project Zomboid server includes up to 10 GB; heavy modpacks or 30 or more players want 12 to 16 GB or more. On your own PC, the official start script reserves 16 GB until you change -Xms and -Xmx.
Most often the game build: players must run the same build as the server (default branch for Build 42, legacy41 for Build 41). Next, a mod that was updated on the Workshop after the server started ("Workshop item version is different": restart the server), a wrong port (copy the full address from your panel), or a wrong server password.