In the action-packed world of Ark: Survival Evolved, nothing tests your survival skills and strategic prowess more than the formidable boss battles. These encounters are an essential part of progressing through the game, as they unlock Tek Engrams and reward Element, a precious resource. This article will guide you through each boss battle, explaining the necessary preparations, resources, and battle strategies to dominate theses bosses on your Ark: Survival Evolved Server.
Bosses
Preparations for Boss Battles
Before heading into any boss battle, there are several general steps that players should take:
Gather a Strong Dinosaur Army:
High-level Rexes, Therizinosaurs, or Gigas are often the go-to choices for their high health and damage output. You'll also want at least one Yutyrannus for its courage roar, which significantly boosts your dinosaur army's attack power and resistance.
Equip Appropriate Gear:
Depending on the boss, your survivor will need different gear. Generally, you should carry a set of high-quality Flak Armor, several powerful guns, and plenty of ammo.
Stock up on Consumables:
Bring along medical brews for health recovery, energy brews for stamina, and enduro stew to boost your damage resistance. Also, carry several stacks of cooked meat for your dinosaur army.
Boss Battles
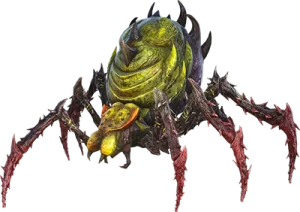
Broodmother Lysrix
A formidable adversary in ARK: Survival Evolved awaits those daring enough to confront it. Accessible exclusively through a portal generated at a Supply Crate or Obelisk on The Island and The Center, this imposing creature also lurks within The Lair on Valguero for those who seek it in the wild.
A weaker version of the Broodmother Lysrix emerges during the climactic final wave of the Gauntlet Mission, Bog Beatdown, in Genesis.
For those brave enough to attempt taming, a unique opportunity arises. The Broodmother can be temporarily brought under your control and ridden by activating the Green Mini Obelisk in the Survive the ARK mission on Genesis: Part 2. It's a thrilling prospect for survivors seeking to harness the power of this colossal creature.
Preparation:
The best method for overcoming the Broodmother is strength in numbers. Tame a pack of Megatheriums, the giant sloths, and a Yutyrannus for its courage roar and damage buff. These creatures were made to combat the spider queen and her brood. Get the highest level ones you can and imprint them for the best stats.
Battle Strategy:
Have your Yutyrannus use its roar to buff your creatures’ damage and resistance before rushing the Broodmother. Send all your tames to attack her at once. Their huge damage output will overwhelm her fast. Stay mounted on your Yutyrannus to continue courage roaring - your megatheriums will need the buff to defeat the spiderlings she spawns!
Corrupted Master Controller
This corrupted AI presents a towering figure with a purplish hue, adorned in shattering purple armor throughout each phase. Upon defeat, the Master Controller's face is unveiled, revealing a striking resemblance to Edmund Rockwell.
To initiate the boss fight, engage HLN-A and opt for the "Arrival Protocol," then choose a difficulty. While entry into the System Root is open to all, the Survivor activating the teleport must have successfully completed a specific number of Missions.
Initially, the Master Controller hovers in the center, hurling mild insults at survivors, interwoven with the in-game story. As the battle progresses, the Master Controller intensifies, shooting lasers from his eyes that dismount players on contact during the final phase. His insults become more heated and frequent, countered by HLN-A's witty retorts displayed on her screen.
Preparation:
Focus on bringing creatures with high health and damage, like Rexes, Spinos, and Therizinos. Fill their inventories with the best saddles and weapons you have. You’ll also want to equip yourself with high-quality armor, firearms, ammo, and med brews.
Battle Strategy:
Face the Corrupted Master Controller's onslaught as it releases waves of Corrupted Creatures. Work together to swiftly eliminate them, targeting the boss's purple glowing weak spots when it appears. Watch out for its powerful attacks, keep your team spaced out, and retreat injured dinosaurs.
As its health hits 25%, brace for the climax. The Corrupted Master Controller summons massive waves, fires energy beams, and maneuvers around the arena. Stay mobile, attack relentlessly, and use healing brews.
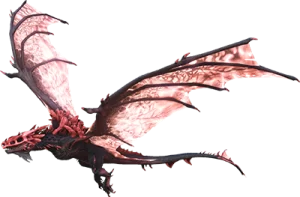
Crystal Wyvern Queen
She engages players and tames on sight, alternating between phases of aerial and grounded combat.
This colossal Crystal Wyvern boasts crystalline formations along her head, back, and shoulders. A striking feature is a clean-stripped Wyvern skull adorning her head like a helmet.
Distinctive wing membranes set her apart, featuring a unique pattern. Her fully dilated pupils give her eyes a pitch-black appearance reminiscent of the Blood Crystal Wyvern.
The Crystal Wyvern Queen's coloration mirrors the difficulty level: light green for Gamma, blue for Beta, and red for Alpha. There's also a rare orange tone accessible only through commands, unseen under normal circumstances in-game.
Preparation:
Prioritize melee damage for your tames, especially your rexes and allos. Get them up to 1,500% melee at a minimum. The queen has high health, so you need to dish out as much damage as possible before your tames go down. Around 30,000 health should help them last long enough.
Battle Strategy:
The queen’s arena allows flyers, so bring your best wyverns and griffins. Their mobility gives you an advantage, allowing you to dive bomb the queen and lure her away from your ground tames. Just watch out for her crystal breath attack! When she focuses the flyers, have your rexes and allos attack from behind.
The queen will summon crystal wyvern heirs to assist her. Take them out immediately, as their breath attacks can decimate your tames. Use your flyers to kite the heirs away from the queen so your rexes can focus their damage on her.
The queen’s crystal breath is dangerous, with a wide area of effect. As soon as you see her rear up for an attack, get your tames out of the line of fire! Her breath can freeze your tames in place, making them sitting ducks. Whistle follow or move them manually to get them clear.
Dinopithecus King
Dragon
The Dragon resides in The Island's Dragon Arena. Access requires tribute items placed in a Supply Crate or Obelisk, triggering the Generate Dragon Portal. In Single Player mode, use the Red Obelisk.
Encounters also await in Ragnarok's Arena and Valguero's Forsaken Oasis, summonable from any obelisk on these maps.
Tame and ride briefly by activating the Red Mini Obelisk in the Survive the ARK mission (Genesis: Part 2).
In Survival of the Fittest, the Dragon appears halfway through the match for taming but turns on its master after a short ride.
For Fjordur, summon it via the Terminal in Dvergheim cave.
Preparation:
Bring a high-level Therizinosaur army equipped with top-tier saddles, as they are resistant to the Dragon's fire compared to Rexes. Carry medical brews, enduro stew, and a high-damage weapon like the Rocket Launcher.
Battle Strategy:
Use the Yutyrannus to buff your dinos and attack the Dragon. Prioritize killing the Pteranodons it summons as they can deal significant damage. Players should try to maintain a distance, avoiding the Dragon's fire breath.
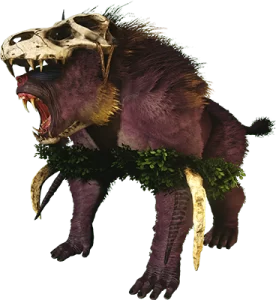
Fenrisúlfr
It’s time to face the mighty Fenrisúlfr, the fearsome wolf boss of Fjordur! This ferocious beast won’t go down without a fight, but with some preparation and strategy, you can emerge victorious.
Preparation:
Stock up on the essentials: medical brews, weapons, armor, and ammo. Have your strongest dinos well-fed and outfitted for combat. Come equipped with saddles, mate boosts, and imprinting buffs. Strength in numbers, so bring your whole tribe if possible!
Battle Strategies:
Fenrisúlfr will emerge with his wolf pack, so focus your fire on the boss itself. Its health pool is massive, so chip away at it while kiting the smaller wolves. Ride your rexes, spinos, or theris and encircle the boss, attacking from all sides. Support your frontline fighters by shooting Fenrisúlfr with assault rifles or sniping from a distance.
When Fenrisúlfr howls, two things happen: it regains health and the wolf pack grows stronger. Prevent howling at all costs! Keep pressure on the boss and wipe out reinforcements as they spawn. If a wolf does get a howl off, pull back for a few seconds until the buff wears off, then re-engage.
Once Fenrisúlfr’s health drops below 50%, the real fight begins. Watch for its leaping pounce and dodge out of the way. Beware of its tail swipe, and keep your distance when possible. Unleash everything you’ve got for the final stretch!
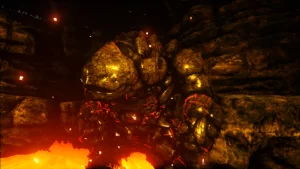
Lava Elemental
The Lava Elemental in ARK: Survival Evolved is a formidable and imposing creature found in the volcanic depths of the game. This massive entity is a living manifestation of molten lava and intense heat. Its body is composed of flowing lava, and it exudes an intimidating and dangerous aura.
The Lava Elemental's appearance is marked by its fiery and molten exterior, with streams of lava constantly flowing across its body. Its form is dynamic and ever-changing, resembling a creature made entirely of liquid fire. Glowing cracks and crevices on its surface give off an intense orange and red radiance.
Preparation:
Bring plenty of ammunition for your guns and a grappling hook. Water containers, medical brews, and cooked meat will keep you energized during the fight.
Battle Strategies:
As soon as you enter the cave, grapple up to the high ledge on the left. This vantage point allows you to rain fire down on the Lava Elemental while avoiding its dangerous lava pools.
Target the Lava Elemental's head for maximum damage. Shooting its body will take longer to defeat this scorching adversary. As a creature of lava and flame, the Lava Elemental is weak to water-based attacks. If possible, bring water creatures to aid you in the battle. Their aqueous assaults will douse the Lava Elemental's might.
The Lava Elemental will spew flaming rocks and molten lava at you. Dodge roll and sprint to evade these eruptions of fire and magma. The pools of lava that form will damage you if touched, so be wary of your surroundings.
Manticore
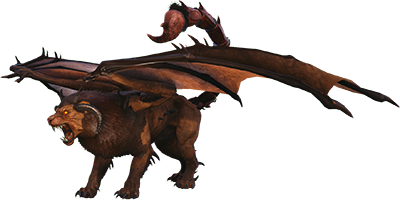
The Manticore is a hybrid creature, featuring a lion's body and head adorned with three rows of sharp teeth, bat-like wings and ears, and a scorpion's tail infused with toxic and lethal venom. Complemented by ram horns – two pointing upward and two curled downward – as well as sharp claws and spikes, its fur adopts a tan brown coloration, and its eyes emit a permanent orange glow.
The creature's appearance varies with difficulty, with the Beta version exhibiting a more orange hue, while the Alpha version boasts a striking red color with deep blood-red fur.
Preparation:
A combination of ground (Rexes or Therizinosaurs) and flying dinos (such as the Quetzal or Wyvern) is recommended. Carry plenty of medical brews, enduro stew, and a high-powered Longneck Rifle.
Battle Strategy:
When the Manticore lands, have your ground dinos attack it. In the air, it's up to the flying dinos and your aim to deal damage. Avoid its ranged poison attack, which can dismount you.
Megapithecus
Resides in The Island's Megapithecus Arena, The Center's Arena, or Valguero's Forsaken Oasis. Players must strategically place tribute items in Supply Crates or Obelisks to generate portals, transporting them to the arena. In Single Player on The Island, the portal is exclusive to the blue obelisk.
A milder variant appears in the Gauntlet Mission, Built Fjord Tough. Tame and ride the Megapithecus for a brief period through the Blue Mini Obelisk in the Survive the Ark mission in Genesis Part 2.
In Survival of the Fittest, the Megapithecus, alongside the Broodmother and the Dragon, can be tamed and ridden. Its ability to throw large rocks poses a threat to structures and dinosaur groups, promising an epic encounter in the icy wilderness.
Preparation:
A high-level Rex or Therizinosaur army with top-tier saddles is recommended. Bring a Yutyrannus for its courage roar and wear a set of high-quality Flak Armor. Bring medical brews, energy brews, and a weapon like the Assault Rifle with lots of ammo.
Battle Strategy:
Use the Yutyrannus to buff your dinos and keep them in a close-knit group. Maintain a safe distance while shooting at the Megapithecus. Avoid its boulder throw, which can dismount and kill you.
Overseer
The Overseer, the ultimate boss on The Island in ARK: Survival Evolved, commands two types of minions: Attack Drones and Defense Units. Accessible solely through the Overseer Arena, achieved by completing the Tek Cave and teleporting to the Observation Deck.
Periodically changing forms into one of the three Guardians - the Megapithecus, Broodmother, or Dragon - the Overseer undergoes transformation at every 25% health loss. Its appearance, resembling the specimen implant's diamond shape, takes on a mass of hexagonal prisms and emits a color corresponding to the difficulty level (red for Alpha, blue for Beta, and green for Gamma) when summoning Defense Units.
Preparation:
Stock up on the best weapons and armor you can craft, and bring plenty of ammo. The Overseer switches between ranged and melee attacks, so be ready for both. Load up your tames with supplies too, in case you need to make a quick getaway.
Battle Strategy:
Plan your attack strategy and focus on specific areas of the Overseer, like its legs or head. Communicate to dodge big attacks and use the terrain wisely for retreats. Stay spread out to avoid simultaneous hits and be aware of the Overseer's changing attacks.
Constantly move and avoid clustering to minimize damage. Command your tames to follow or regroup, and watch for patterns in the Overseer's missile and laser attacks. Stay focused, call out for healing or low armor, and support your tribe with cover fire and aggro management. Coordination is crucial for success in this intense battle.
Rockwell
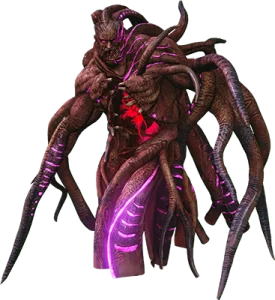
In ARK: Survival Evolved's Aberration Expansion Pack, meet one of the primary antagonists of the ARK storyline. This individual, previously an explorer who documented recipes in Explorer Notes, ultimately descended into madness due to his "ascending" experiment with Edmundium, more commonly known as Element by villagers, as revealed in his notes.
Preparation:
A group of high-level Megalosauruses and Rock Drakes is advisable. Carry medical brews, enduro stew, and a high-powered weapon like the Shotgun with plenty of ammo.
Battle Strategy:
Attack the tentacles in the first stage while avoiding Rockwell's energy beam. In the second stage, attack Rockwell's heart while dealing with the waves of Nameless and Reapers.
Rockwell Prime
Rockwell Prime, the final boss in Genesis: Part 2 and the culmination of Sir Edmund Rockwell's evolution, appears smaller and more robust than his previous forms. Notable features include a sealed chest cavity, a more human-like yet still disfigured face, glowing purple and blue irises, fleshy tendrils in place of tentacles, an additional spine with human arms, scattered eyes and faces in the arena, large tumors on his left side, and a fleshy throne integrated into his body. He is also attached to the arena walls through overgrown limbs extending from both sides of his body.
Preparations:
Stock up on ammo, weapons, armor, and healing items. Bring extra sets of gear in case anything breaks. You’ll want the best guns, swords, and dino saddles you can craft. Don’t forget food, water, and medical brews for you and your tames.
Breed high-level rexes, spinos, theris, and megatheriums - the more health and melee the better! Imprint them for a damage bonus. Level them up before the fight. Bring a yutyranus for its courage roar and a daeodon for healing.
Battle Strategy:
Send rexes and spinos to kill tentacles and corrupted dinos. Theris and megatheriums attack the heart. Keep your tames healed and courage roared. Move constantly to dodge attacks while firing at the heart. When the heart is destroyed, Rockwell Prime will be defeated!
Summoner
The aggressive Summoner patrols the Rockwell's Innards Biome, teleporting in front of provoked survivors with a loud scream.
In the Choose Your Own Adventure mission of Genesis: Part 2, the towering Macro-Summoner, shielded from damage, is flanked by two colored Summoners. Matching color panels disable shields, allowing for attacks. Dispatching guards exposes the Macro-Summoner temporarily.
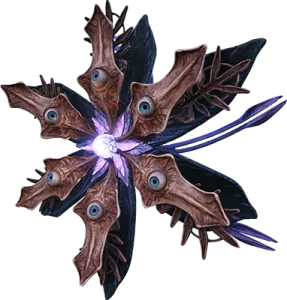
The Summoner, resembling a closed flower, transforms when provoked, revealing layers with fleshy appendages and teeth. Spawned creatures exhibit a skin rash. In the Rockwell Prime fight, Gamma, Beta, and Alpha versions have green, blue, and red glows, respectively.
Preparation:
Take your most skilled fighters with you into this battle. Work together as a team to defeat the Summoner and protect each other. Assign different roles like healers, ranged attackers, and melee fighters. Communication is key, so go in with a plan.
Battle Preparations:
The Summoner will call in dangerous creatures to attack you, so be on alert! Focus your attacks on the Summoner, but keep an eye out for the dangerous creatures it summons. Take them out quickly, then get back to fighting the boss. Watch out for its homing missiles and laser beam attacks. Dodge and weave, then strike when you get an opening!
Remember, the key to any boss battle is preparation. The better equipped and prepared you are, the higher your chances of success. Each boss battle in Ark: Survival Evolved offers unique challenges, requiring careful planning and execution. Good luck, survivors!

